|
the building of model topography
I have already covered the basics of how to
build up topography in the
baseboard section. The baseboards will need to be cut to the
topography required. Measure and mark out what you want TWICE and then cut
once! Model topography can be either solid (foam) or shell.
If you have hidden tracks underneath you
scenery shell topography is what you are going to need. There are quite a
few techniques but I shall stick with the one I use and know works. The
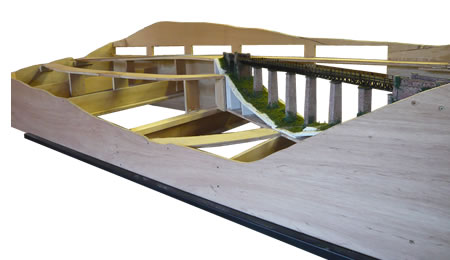
photo below shows the baseboard for our viaduct section. Track beds has
now been added to connect with the viaduct and lower track. In addition,
there is a hidden track at the rear. The slots cut into the rear side
allow access to this and the lower track. It is important to ensure that
the track beds are well supported. I also added the riverbed at this time.
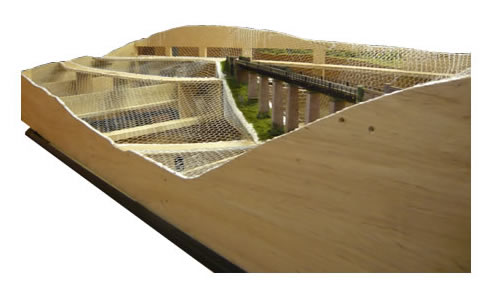
Budgerigar wire netting is then stapled to
the baseboard sides and track beds. I use a heavy duty electric stapler
and staple every wire of the netting. The netting can be manipulated to
the form and contours required. Once firmly attached, the netting is cut
back using sharp side cutters, making sure that wire does not extend to
the edges of the board. I find this a fairly horrid job and rarely get
away without bleeding!
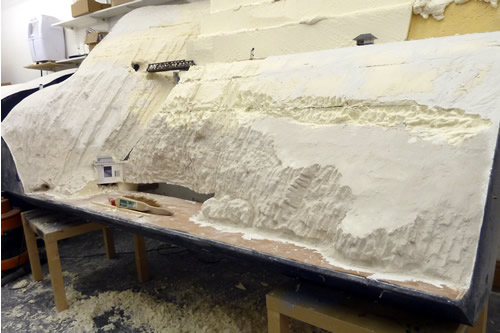
The mesh is then covered with plaster
bandage. This is pre-cut to the approximate lengths required, quickly
dumped in water and laid on. We overlap the strips by 1/2". Three layers
are added at 90 degrees to the previous layer. One has to work quickly and
with the best will in the work, the job is a tad messy. We always lay down
a plastic sheet before starting. The bandage needs to be smoothed down
before it has cured. Once hardened, we trim the edges flush with the
baseboard using a sharp Stanley knife.

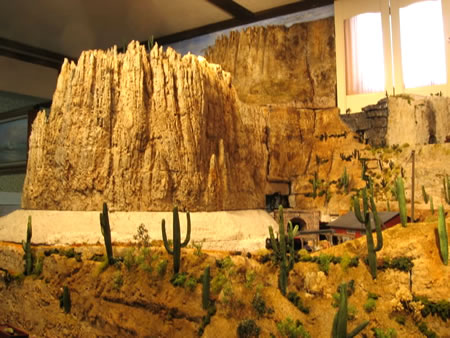
Foam is the construction of my choice if at
all possible. I prefer closed cell blue foam but several foam products
used for insulation are also acceptable. If foam is to be glued together,
I use a hot glue gun. PVA adhesive does not work at all well. A hillside
or mountain can be built up out of layers. Sheets of foam can be cut using
a sharp knife or hot wire. Foam is messy beyond belief but it is really
worth it. I have been known to cut sheets with and electric jigsaw and
have sanded it to shape using a rotary sander. Tiny bits of foam will get
everywhere but what the hell! I have even found it in my corn flakes
before now! Smooth areas can be formed using a Surform or by electric
sander. This is why they invented vacuum cleaners!
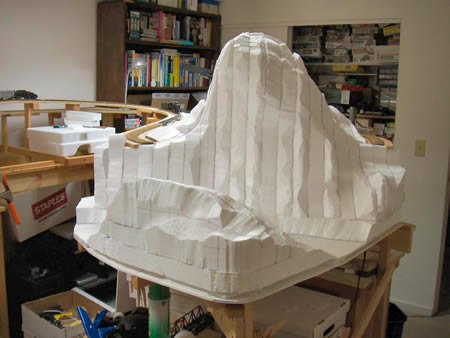
Foam can be shaped and carved to render high
detail. At times, when modelling rock, I will attack the foam with an
electric drill. By moving the drill in the right direction, one can
produce wonderful sub-base for rocks.
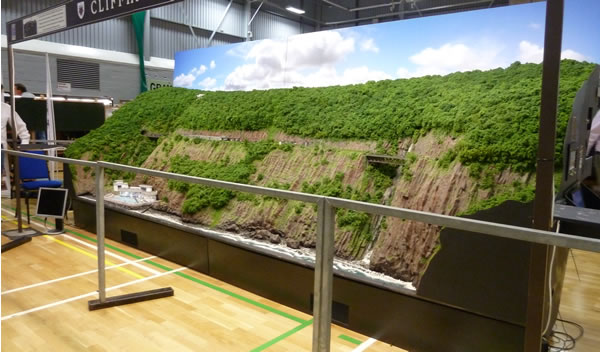
Cliffhanger under construction

|