|
how to model ground textures

a little bit of rural
England in 00 scale - Pendon Museum
We have come an awful long way since the days
when model ground was represented by coloured sawdust stuck on the
baseboard with glue.
We have also fixed the compass direction of
the model, as there are great differences between North and South facing
aspects.
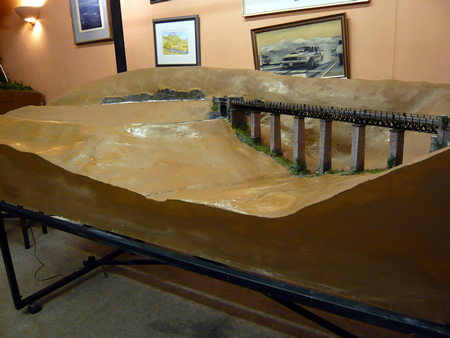
The first job is to apply a layer of Polyfilla to the foam or or plaster bandage. The rule is
observation and always work from good photographs if you can.
If the surface is to
be developed, a small section should be laid down at a time. In the photo
below, the rock cutting has already been built and painted. No other
special surfaces were needed on this module, so once the plaster layer was
applied, (about an average of 3mm), it was smoothed using a 2" wet brush.
You may have to use a but more plaster to make good any defects that have
appeared on the foam or plaster bandage. Small details can be formed such
as a path as in the photo above.
It is not a bad idea to tone down the plaster
with brown poster paint. Do not use fabric dyes for this as the plaster
will break down. I then paint the whole lot with brown plastic matt
emulsion.
the plaster has just been
painted with emulsion - it is still wet!
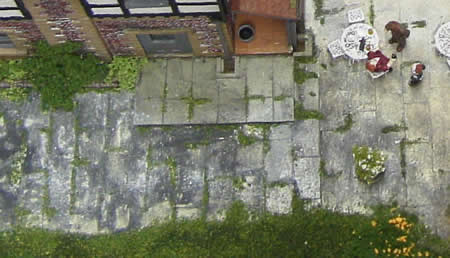
Pave comes in all shapes, sizes and
materials. In the photo below, the slabs are just thin Plasticard cut to
shapes and glued onto the foamboard sub-base of the hotel. The aspect is
North, so they have been carefully weathered using acrylic paints. Plant
growth is carefully added in the cracks between the slabs.
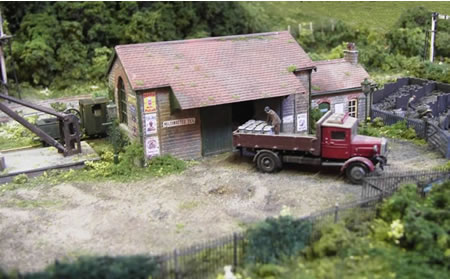
It is no use at all just scattering some
commercial product to represent gravel unless you are modelling a surface
that has just been laid. The grain size of most scatter is just too large
in 4mm scale. Gravel quickly become mixed with particulate and the
underlying earth. I tend to use a layering technique, starting with a
colour washed plaster finish. I then use very fine sifted sand of the
correct colour and scatter this onto the plaster using dilute PVA glue.
Vehicles will tend to push the gravel in various directions when
manoeuvring or braking. I actually run a model vehicle over the wet sand
to simulate this. While the glue is still wet, I then drop mixtures of
weathering power to begin to get a realistic surface. Sometimes, I pat the
whole mess down with a damp small wood block. Once the glue has almost
dried, potholes can be scraped out using a small pick.
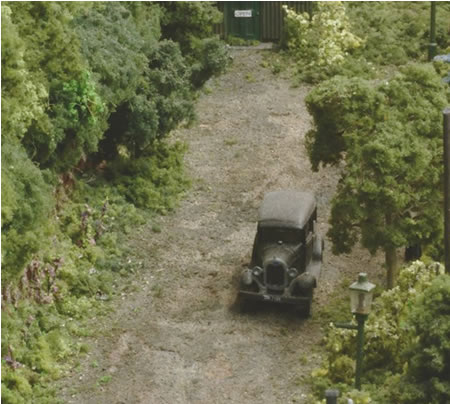
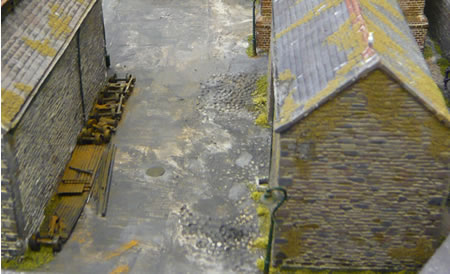
The road below was once tarred. The top layer
has broken away in places. This was achieved by adding another layer of
fines and powder and sucking some of it off with a very fine vacuum nozzle
while the glue was still wet.
The rough concrete below clearly shows ridges
which were formed when the concrete was originally screeded. Concrete is
usually laid in sections and the cracks between can be shown by scribing
the plaster once it has dried, as indeed can sections which have cracked
or begun to break up. The screeding lines were made by tamping the wet
plaster with a thin sheet of brass; just like the real thing! The concrete
is painted by using very thin colour washes.

Cobbles, carved in foam board. Many
commercial products are also available but are often not quite as
realistic.
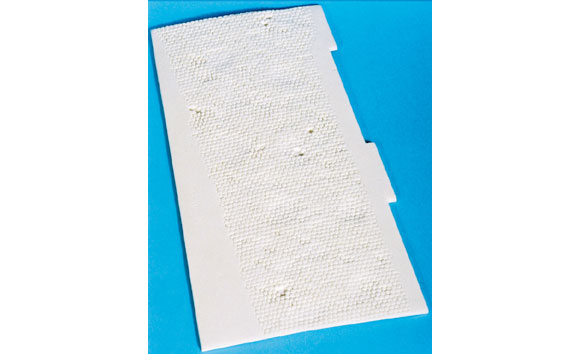
In the photo below of our harbour module,
Wills plastic sheet cobbles were sunk into the 'plaster concrete' and in
places nearly filled up with plaster.
The loose 'Cotswold Gravel' in the hotel
driveway has been dragged onto the county B road.


|