|
scenery backdrops
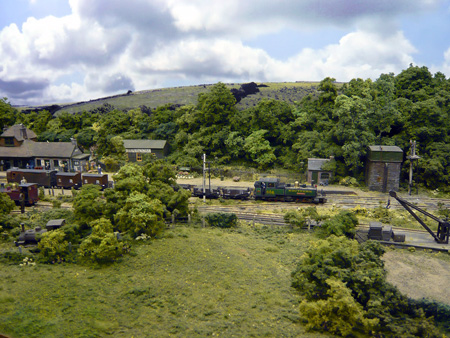
unadjusted photo showing new backdrop
In my mind, the backdrops of a model railway
are a critical part of the illusion. In this country, there seems to be a
distinction between 'dioramas' and model railways. With a bit of
forethought, even a long model railway can still be a diorama. The
requirements are more demanding however. The backdrops should be taller,
there should NEVER be right angled corners in the sky, and
the transition between the model and backdrop has to work through a wide
arc of viewing angle. Usually, I begin building a layout by producing the
backdrop first. This affords the best chance of integrating the foreground
with the backdrop.
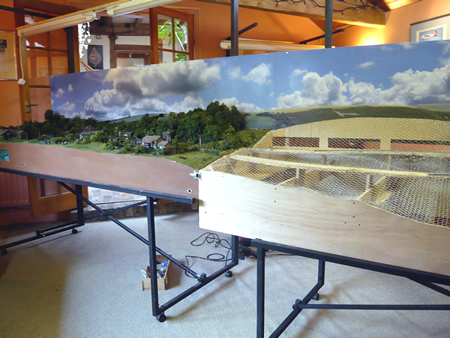
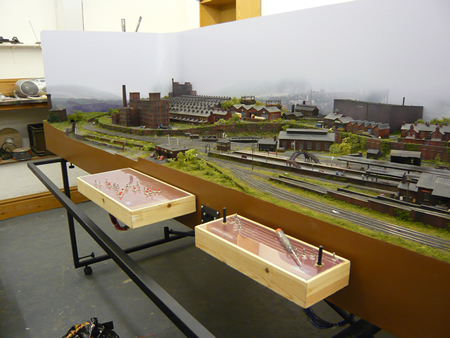
The backdrop of the
viaduct module is in place to help develop the baseboard topography to
match. During construction, the backdrop will be removed several time to
avoid damage.
Some scenic backdrops are available from the
trade but most are stock items which will appear again and again on
different layouts. Some backdrops are painted by an artist. I have to say
that in my view, with a few notable exceptions, painted backdrops just do
not work very well at all.
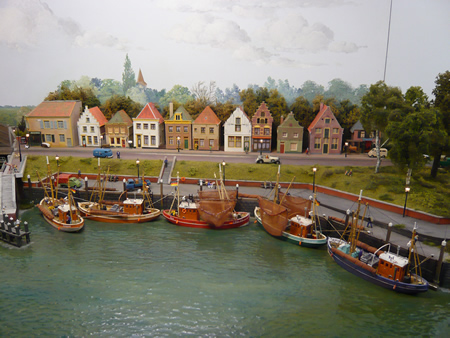
Ems-land
Moortrack - an extensive layout which is one of the few with convincing
painted backdrops
The likelihood of finding a commercial
backdrop that will fit in with your plan is fairly low indeed. It might be
far better to use a plain colour (such as light grey) instead of a
backdrop that does not properly fit.
I notice that many backdrops are made of
plywood and under lighting, the wood grain is clearly visible. Some use
hardboard but this is very heavy and subject to damage. In my view,
aluminium sheet is easily the best material to use. Corners can be rolled
by a sheet metal worker to your specification and it is the perfect
surface to attach a self adhesive vinyl backdrop or just have sprayed matt
grey. Do not forget that if you paint aluminium, it must be sprayed with
metal etch first. This is a job best left to car body shops. Hand painted
or rollered skies do show marks which will destroy the illusion.
We make our own backdrops from photographs.
Below is a description of how we made the backdrops for County Gate.

We started off with this 360 panoramic put together with Autostitch. A bit
up and down, but my son had a hangover that day!
To start off, a decent high resolution 360
panoramic of the required sky is needed. One has to choose the type of sky
needed and be prepared to drop everything and go out with the camera when
it arrives. Devon and Cornwall have rather typical cloud formations so it
was some time before a similar situation occurred in Herefordshire.
Luckily, my son, (the family photographer) was visiting us when the 'sky
to die for' arrived. Sadly, he also had a bit of a hangover, so the
resulting shots were a tad out of alignment to say the least. We used a
programme called Autostitch which saved the day!
The sky had to be blown up to 10.2 metres
long.
This large, there was a small degree of pixilation. We used the 'median'
facility in Photoshop to deal with this. We pasted a metric scale along
the bottom and up the side of this long image. We were then able to
collage hills, trees, etc in the right places along the image. We adjusted
image colours to match our model, allowing a certain fade to give the
effect of distance.

backdrop for harbour
section
The image was converted to CMYK format and
printed on gloss vinyl. Experience has shown that this gives us the best
resolution. We have tried self adhesive paper and matt vinyl, none of
which works so well. Be careful, as conversion to CMYK may need
more colour equalisation. Your computer monitor might not be set up to see CMYK properly. Best print a test section
with the same printer that will be used. If the model is to be kept in
direct sunlight, use UV resistant inks. Once the ink on the vinyl has
'gassed off' which takes about 12 hours, a clear matt vinyl is then
laminated over the print.
It is not every company that is interested
and will make to effort for model railways. We have been luck to find
Clancy Wilson of
Signrite who
has worked with us to develop a perfect technique for printing and
applying backdrops.
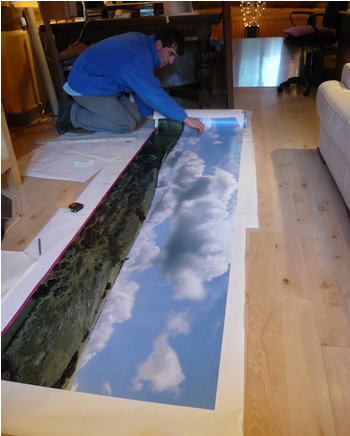
We cut the roll of backdrop at a joint near
the middle, attached the aluminium panels temporarily to our sitting room wooden
floor with double sided tape. One other advantage of using vinyl rather
than paper is that it is applied using a mister with water and a little
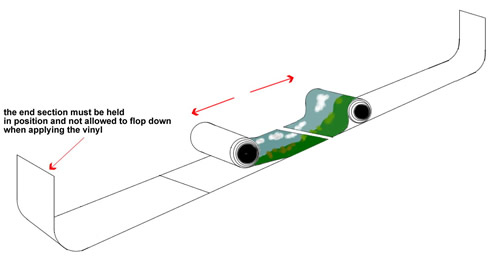
detergent so things can be moved around.! We first experienced problems attaching the
backdrop to the curved sections. The aluminium panels
are very thin and if they lose their shape during the application process,
the vinyl will come away later. They must be supported in the correct
shape during application.
Once attached to the backdrops, the interface
between model and image can been softened with trees where necessary. Hard
edges are much harder to hide unless you have got the colours perfect. I
have to say, we had three goes at this until we had a perfect job.
Clancy Wilson, head man of
Signrite
fitting the new backdrops

the next panel is laid down and is ready for the vinyl
unadjusted photo showing
new backdrop
This is another backdrop
printed by Signrite of Oldham in 1959. The model, built by us, is in N
scale and is bound for Dubai. The backdrop was developed to represent a
damp cloudy day.
We had intended to show a vague sea/sky
horizon behind the port section. It did not work as it looked quite wrong
with different viewing angles. We were forced to fall back to receding
cliffs only which work better.

|