|
how to make model railway fencing and
walls

dry stone wall from Ten
Commandments
Model railways need huge lengths of fencing
and walls of one sort or another. We are lucky to be very well provided
for and it does not take long with Google to find what you want. Walls and
fences really do define a region and era. The Welsh, for instance seem to
have a fetish about dry stone walls which they are somehow able to build
even up the steepest mountainsides. The shape of the stones in a wall will
again depend on the area. Often, Welsh walls have more rounded stones than
those shown above.
In the Corris region, slate slabs would be
used.
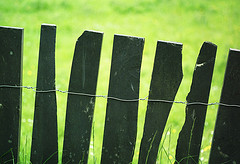
Once upon a time, the Welsh would repair
fences with old bedsteads. It always puzzled me why they should have so
many to spare. Then along came the Yuppies, or whatever they were called
in the 1970s. They decided that old bedsteads were cool and spirited them
all away in their estate cars. Now there is not a bedstead to be seen,
west of Hadrian's wall!
Elsewhere, farmers would employ wooden post
and wire. Everything is available but you may have to spend some time
surfing the net to find it.

Wooden fences are supplied both in plastic
and laser cut wood.

Traditional metal fences are sullied as brass
etchings


yards of wire fencing
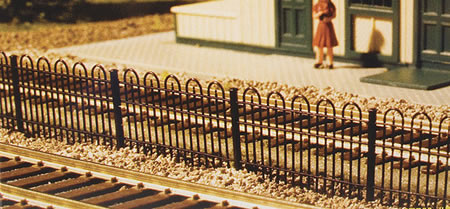
Many railways protected their lines with
concrete posts and wire.. Most of us who work in 4mm/ft, start off
with Ratio concrete posts.

this is how Ratio reckons the fence should
look
£3.30 will get you 36 posts and a reel of
this absurd nylon fishing wire! Each post has the position of the wires
marked as a groove and you are supposed to glue the fishing wire to it.
Having found that you cannot glue the nylon strand, most then drill all
the posts and thread the wire through. Well, forget all that!
The first job is to paint the posts in
concrete colour. I always first spray with grey etching primer. I find
that unless one does this, the posts will dry glossy, even if you use matt
paint. You may at this point elect to weather the posts. The next job is
to glue them into the layout. Using a spacing jig, drill suitable sized
holes into the plaster and then glue in the posts using 5 minute epoxy. It
is important at this time to use some of the posts as bracing at the end
of each run.

Once the posts are firmly in place, it is
time for the simple job of adding the wires. Use 3 amp fuse wire which can
be purchased in large rolls from Maplins and the like. Starting at one
end, hold the wire against the post in the correct position and touch it
with a soldering iron until the wire sinks into the post. The plastic will
close up behind the wire if you do it right.
You then just work along each post melting in
the wire while maintaining a light tension. Always start at the bottom.

Trim off the excess wire, touch up the posts
with paint and weathering powder and paint the wire with matt Humbrol
enamel.
Fencing needs to go on the model fairly early
in the proceedings as plants quickly grow all over them and that has, of
course to be modelled.
Despite the fact we are spoiled for choice,
there are still some prime examples of 'how not to do it' on the
exhibition circuit.
1. Bits of chopped up balsa wood or plastic
do not make good looking stone walls.
2. A few lines scribed on plaster fools no
one.

|