|
how to model water
Water is modelled in so many ways. Some
methods work and others are disastrous. The worst way is to install a
sheet of rippled glass! There are many products available on the market
and a large number of them just will not cure so the surface remains
sticky and will collect every thunder bug that visits your railway room!
One in particular just requires heating to make it liquid. Sadly, probably
due to 'Health and Safety', the damn stuff melts at such a low temperature
that it too becomes sticky on a hot day!
Another problem for models is that dust will
gradually land on the water and the effect is lost. If the surface is
really hard, it is possible to clean this off with a soft brush, but in
the end, a new thin gloss coating has to be applied to keep the whole
affair looking wet.
Although very slightly light blue in colour,
water changes its appearance mostly due to reflections on the surface.
Rivers may also have a high particulate content and may be brown in
colour. The River Platte in Colorado is described as being too thick to
drink and too thin to plough. A river may be relatively clean, but an
outfall from say, a factory or confluence with another stream may result
in most interesting colour effects.
So let's look at some methods that work.
All the experts say that this should never be
used and I have to admit that it made sense. That is until I saw the East
German Rügensche Kleinbahn 009 model railway. Railway ferries plied across
the river being operated by turning a handle and the whole affair looked
entirely convincing. It is a major crown puller in every exhibition it
goes to. The whole affair depends upon clever colouring of the river bed
and some good construction to ensure it is water tight. I would have to
say I was excited about the model and if I needed a moving boat would do it
myself. At the end of the show, the water is decanted into a container
using a sump plug.
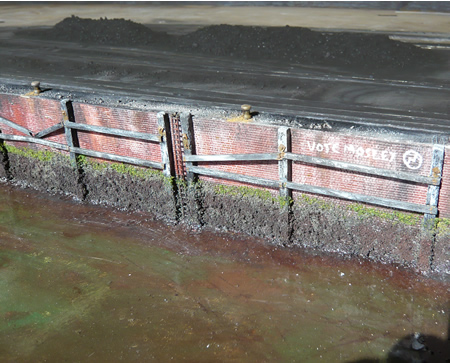
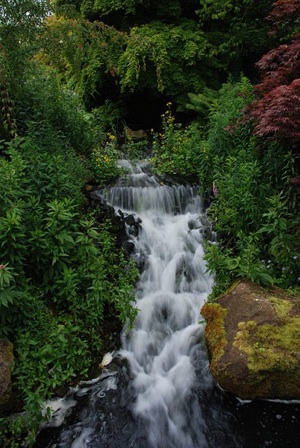
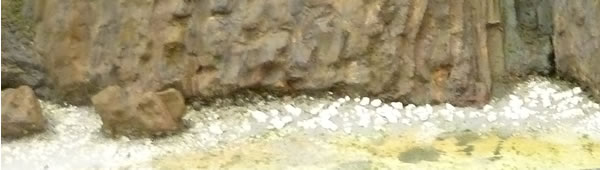
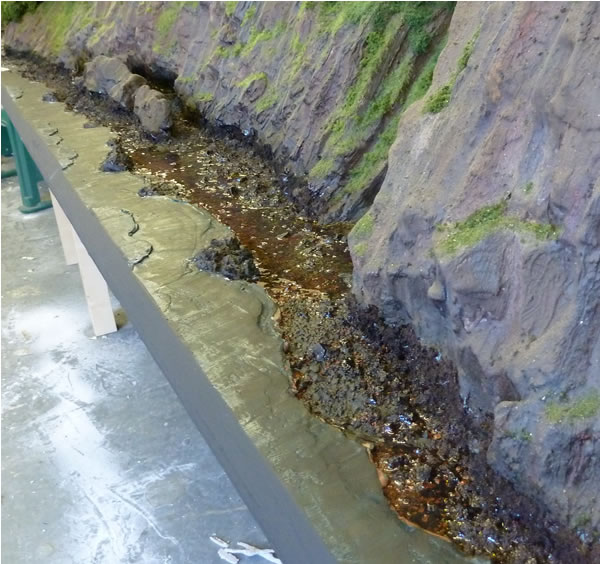
A rarely seen view of the
stagnant pond behind County Gate Station. This is the water supply for the
locomotives
The first job is to model the bottom,
painting it in browns and greens. I then model the banks add marginal
plants such as reeds fallen branches, etc. I do not use the 'special
products' available as they all take too long to cure (if at all). I
prefer two part clear epoxy resin with a cure time of about an hour. This
is available from suppliers of composite aircraft, and a pot last a very
long time. Another alternative is epoxy varnish supplied such as is
supplied by Interlux. It does take longer to cure though.
While the 'water' is workable it must be
carefully brushed up to the required edges so that no meniscus shows.
Several coats are required to ensure a feeling of depth. Care is needed to
prevent bubbles and no coat should be more than one mm.
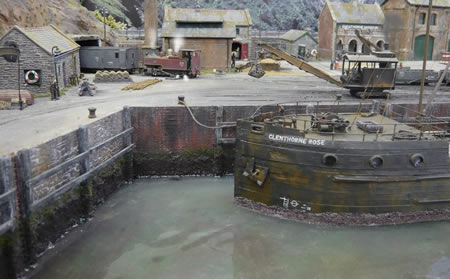
This is also the method I used for modelling
the dirty harbour water at Glenthorne Harbour. The description below also
explains how I built the harbour walls.
The harbour wall were made using Wills sheets
expoxied to the timber framing. The wall near the cliff is random stone
and represents the original small fishing dock which existed prior to the
expansion into Glenthorne Harbour. The brickwork of the dock is very
weathered as this is where coal is continually offloaded. The top to the
Wills sheets is level with the rail head. The brickwork was extended onto
the plaster by the use of a scribe in order to create a 9" edge brick
capping. The tide line has been added at this stage but seaweed and
mussels will wit until the timber groins are added.
A useful tip, if you ever want really worn
and distressed model wood, soak the parts in an enzyme called 'lignase'.
This eats away lignin. Remove and wash when the erosion is to taste. If
using balsa wood, the enzyme 'cellulase' will first remove the more
'pithy' element. The enzymes are not too hard to get from a scientific
supplier. Deeply fissured timber can be modelled in this way. I also use a
steel wire brush in a Dremel to distress end grain, as in the tops of the
timber piles.
The timber is first painted in matt black and
then the surface colours are dry brushed. Wood is rarely brown in colour,
unless it has just been creosoted. The nail holes on the horizontal
rubbing strakes are added once the structure is assembled using a dental
pick and rust colour added. One strake has become detached and the nails
remain in the pile, represented by fuse wire with a tiny blob of epoxy at
the end to represent the head.
The seaweed has been added. A thin line of
green Ulva at the edge between sea and air and bladder wrack (Fucus
vesiculosus) and Chondrus
crispus below. The nails can just be seen that attach the rubbing
strakes. Seaweed is rarely modelled correctly on dock sides. The brown
algae begin about a foot to 18 ins below high water as it is more
efficient in photosynthesising below water.
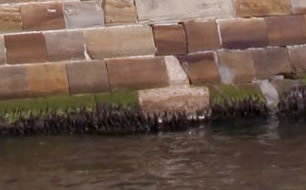
the sea wall at Whitby
I first paint a line of PVA for the green
algae. I guide the level by resting the brush horizontal on the edge of a
piece of wood the correct height. A few small squiggles are just fine! The
baseboard is then placed on its side and Woodland Scenics 'blended turf'
is sprinkled on. This is just the right colour. Once this has dried,
I then painted the rest of the wall down to the bottom with a liberal coat
of PVA. This is sprinkled with grey fine chopped foam. The baseboard is
the put back to the horizontal the the PVA/grey foam mix is very lightly
brushed downwards with a soft, wet sable brush. In a few places, the wall
will again be exposed, which is how it ought to be. Once this has dried,
excess is removed using a dental pick and the surface wet brushed with the
correct reddish brown paint. Some of the grey colour shows behind which is
also correct. The brown colour is allowed to spill onto the 'sea bed'.
If you are modelling mussels, these can be
made from very small round seed and painted semi mat black and added where
needed. I felt Glenthorne was probably a bit too hostile for mussels!
The rest of the sea bed was painted while
this was still wet using browns and greens, 'well mottled'. If there is to
be a transparent sea finish, don't forget that some ships will ground a
bit now and then at low water and leave marks. Some will be thin and well
defined, where the end of the keel or rudder has scraped. Where the keel
has touched along its length there will be thicker dark lines, represented
in the photo below by horizontal brown splodges!
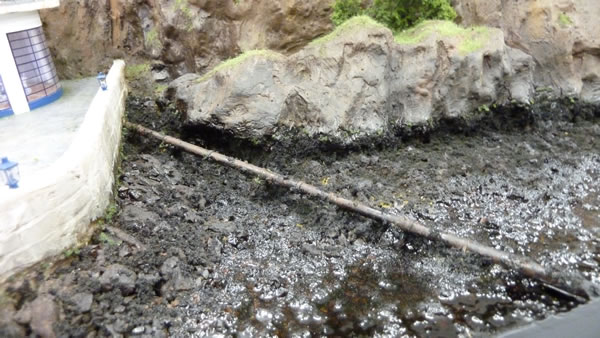
the
coal wharf walls finished with a rather uncomfortable reminder of the
'Black Shirts' of that era. The lines under water will represent keel
scrapes once the water has been built up. At this point, only one coat of
'water' has been added.
The water starts off using West two part
penetrating epoxy. This cures rock hard in two hours and covers very well.
I brush it up a little onto the seaweed to represent wetting. I will apply
three coats of this, (each about 1mm thick). This is as far as I can go at
this point until the ship is in place. The rippled surface can then be
added, by working the surface with a brush while the epoxy is beginning to
get a bit stiffer.
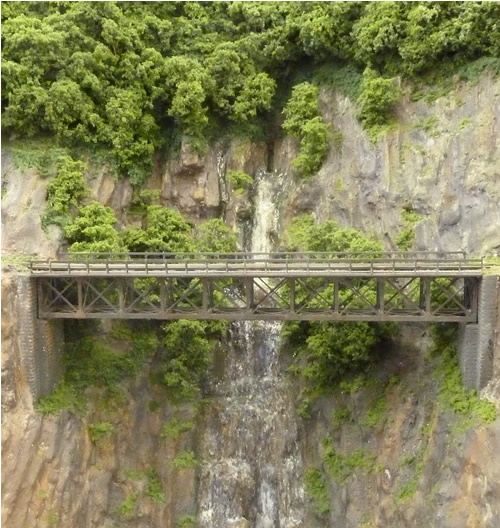
Below, is a description how I built the East
Lyn River.
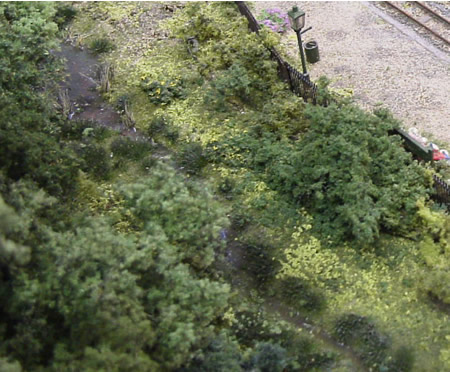
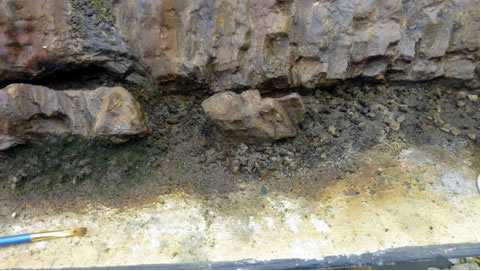
The river bank in front of the viaduct is
detailed. The East Lyn can be quite fast flowing during rainy periods and
the banks are gradually eroded. This exposes tree roots and more boulders,
which eventually fall into the river. In places, the bank will collapse.
On the inside of bends, shingle can be deposited.
Firstly, the river is coated with PVA and
Woodland Scenics talus scattered on the river bed and pushed into the glue.
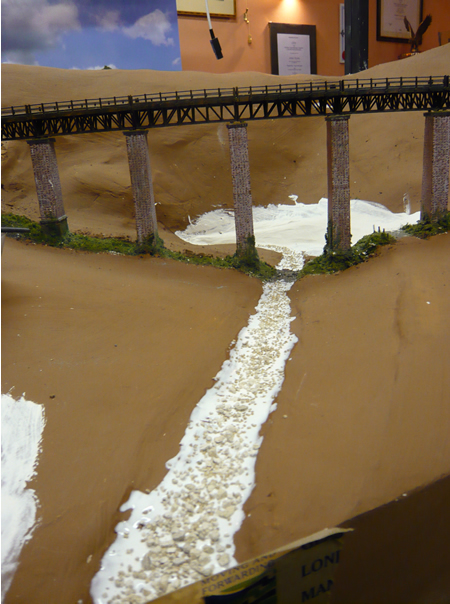
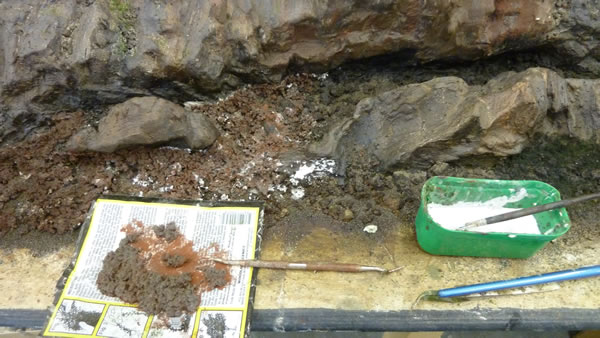
After painting with the desired colours
(browns with a few patches of green), the first
layer of water is added. This is two part epoxy resin. (West epoxy).
Shingle banks are carefully added while the epoxy is still wet.
The banks are modelled using Polyfilla, with
talus pushed into the vertical surface and sea moss pushed in to
represent tree and shrub roots.
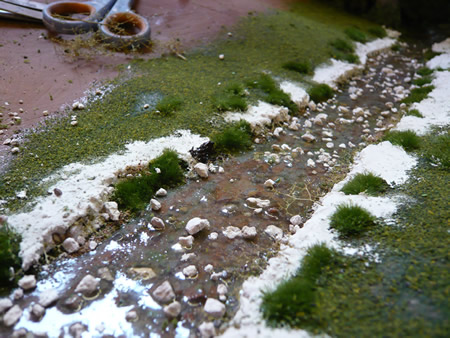
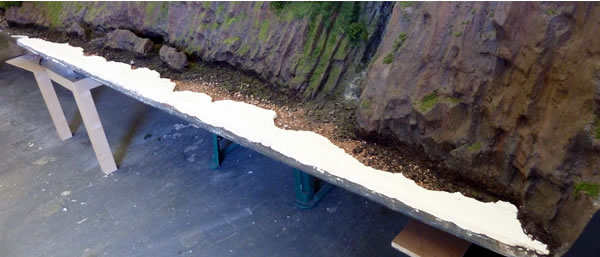
here the banks are built up and detailed
Once this is completed and painted, the
surface coating of the river itself was modelled to give the river the
impression of movement.
We have tried water effects by Woodland
Scenics but do not like the finish, which is not sufficiently glossy. In
the end, a second coat of two part epoxy was applied, and just at the
right moment when nearly cured, it was manipulated with a dental pick with
touches of gloss white added to simulate foam and movement. An alternative
is to use clear silicone sealant which can be easily moulded to your
requirements.
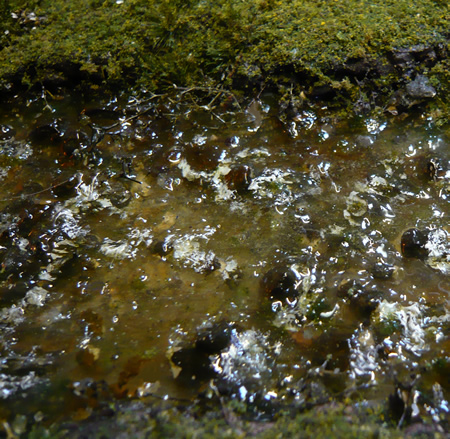
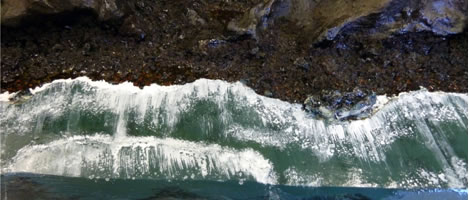
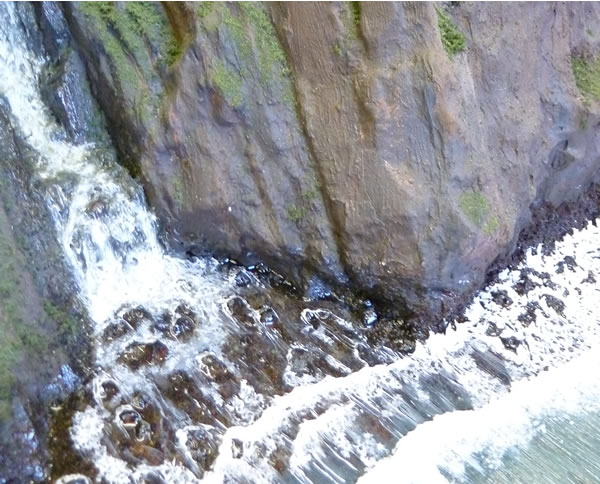
A hard to take photo. The completed water
effects: direction of flow to right
A faster moving river can be modelled by
adding PVA with a little white water-based paint included and moulding it
to represent foam down river of the rocks.
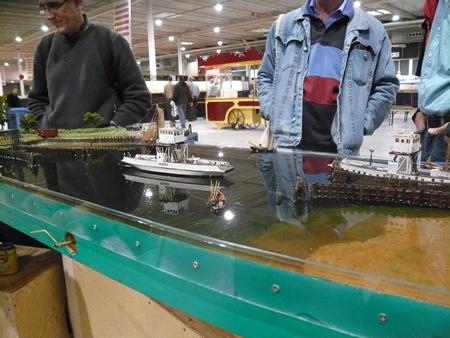
We have our own system. click
here
for video
The water is modelled using clear and
white silicone mastic.
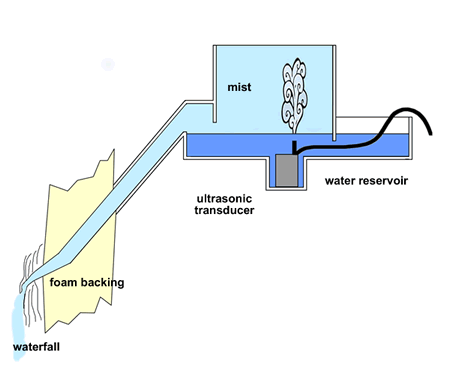
A great deal of care was taken to create the
falling water using clear silicone mastic mixed where required with a
touch of white. A number of ports were created to the back of the
layout. The exits were hidden in the waterfall by silicone 'falling
water'. Two 'mister boxes' were constructed housing ultrasonic mister
transducers. With a fair amount of 'jigging around' we got the desired
effect. Water level have to be maintained through a show, of course, and
a draft will blow the mist away from the falls. Still, you cannot have
everything!
Making the 'water'.
I squeeze out some clear silicone sealant and
mix with a small amount of white paint. A sheet of cling wrap is stretched
out onto a flat surface and the sealant applied in the length and shape
required. I mould the sealant using dental picks until satisfied with the
result and then leave the concoction to cure (about 12 hours). It can then
can be carefully peeled away from the cling wrap and attached to its final
position with a touch more sealant.
You can experiment with different effects if
you like as the material is extremely cheap!
Once the water drop is in place, I then blend
the tops of the fall with more sealant and add whitish sealant and mould
to represent splashing and disturbance at the bottom. Once full cured,
sometimes I add an additional coating of two part epoxy along the
river/stream at the top, down the fall and in the lake/river below.
Sea is not often represented on model
railways and represents quite a challenge.
If no sea shore has to be represented, I
prefer to use Artex. This ghastly material is usually found on house walls
and ceilings in swirls or some other squirrely pattern. Whole articles are
written on how to get rid of the stuff. It sticks to anything and along
with cockroaches can survive a nuclear blast! This is slapped on with an
applicator and then moulded to produce 'popple' or waves as required. Once
hardened, it is painted as desired and then coated with high glass
varnish.

a first class example of a lake made in this way -
by Don Annison on his N Gauge layout
“Bassenthwaite Lake”.
How I model the sea and shore.
To be more accurate, this is about modelling
the waves as they come ashore. As usual, there are countless methods to
achieve this but I shall share the procedure I find works best.
Whether you are modelling the sea lapping onto a sandy beach or onto a
rocky seaweed strewn shore, the real work is to get the shore modelled
properly. A sandy beach is easy and is best made with plaster and
painted the correct colour. Do not go ahead and work from memory though
as even the beach has its subtleties. Always work from photographs;
either your own or ones you find on the internet.
We are going to look at how to model a realistic rocky shore using my
Cliffhanger as an example. I wished to include some rock pools so the
topography was carved to create this behind the big rock outcrops. The
large rocks were again made from Polyfilla and small talus was a bought
in product found at a model railway show or made from broken up lumps of
Polyfilla. There is a moment when the plaster starts to cure when it can
be broken up very easily.
Once the rocks were fastened using PVA glue,
they were dyed to the correct colour using aerosol weathering sprays
supplied by Modelmates.
The next job was to add the seaweed. This
represents Fucus vesiculosus (bladder wrack) which is common in the area
I am representing. For this you can start with Woodland Scenics Coarse
turf dipped in brown emulsion paint mixed with PVA adhesive. This horrid
mess is pushed around so that it is attached to rocks and up the cliffs
to the high water mark.
Further details can include mussels which I
represent using poppy seeds. Once this has dried, the shore is sprayed
again with Modelmates weathering dye. The seaweed absorbs the dye more
than the rock so it is defined very well indeed. Limpets can then be
represented by tiny blobs of thick paint of the correct colour. In the
rock pool, the ecology is a little different. There are green strands of
Ulva and you can even include small red anemones.
The first wave can then be modelled in
Polyfilla. I temporarily fitted a shallow shutter on the edge of the
layout to ensure that the ‘wave’ was reasonably level. The second wave
was then added in plaster and all was painted in turquoise. The shore
itself can now be filled with water to the correct depth using West
Marine Penetrating Epoxy.
first wave
The foundations of the waves are laid and painted and the first pour of
resin has been done in front of the waves.
shore detail with sewage pipe outlet.
'The solution to pollution is dilution!'
The next step is to add the artist gloss
medium in a line along the breaking wave. I add a small amount of white
to the medium to represent the foam. The shape of the breaking wave can
be formed using a rotavating movement with your dental pick then, using
a small stiff brush, the medium can be drawn back as shown in the next
image. Splashes can be made where the wave hits the rocks.
The final job is to add the foam using white
tinted medium. You must remember that the previous wave begins to draw
back and acts in the opposite direction as shown below.
The
waves and foam complete. All that remains is a good coat of Bondaseal
clear varnish when all is thoroughly cured (at least a week).
Modelling water presents some fascinating
challenges and is one of the really fun parts of railway modelling.

|