|
How to design a model railway

There are only three absolutely certain
things about model railway layout design.
1. No matter how hard you try at it, you
will always wish you had done it differently
2. You will always wish you had more space
3. Less is more
So let's look at some of the things you
will need to consider.
Model railways can be split into two
categories: prototype or freelance.
Modelling a real place accurately can be
extremely challenging. Even a small wayside station can have a platform
length that can easily run the full length of your bedroom! I once saw a
model of Barmouth railway station and yard in its heyday. It ran through
the full length of the attic in a stately home! If you intend to go this
route, make sure that you do not bite off more than you can chew.
Of course, by modelling a real place, you
will lay yourself open to scrutiny by a host of people (some very
strange indeed and they always start off with "excuse me") who will then try
find fault where ever they can! Of course the real place will evolve, so
like it or not, you will have to fix a time for your model. Be prepared
for a great deal of research!
The near perfect model of Chelfham Station on the L&B by the
Shoreham-by-Sea MRC in 7mm/ft
An alternative is to extract the 'essence'
of a real subject, simplify it and compress it until you have a viable
model that will fulfil your needs. Dduallt, a 009 model by David and
Robert Waller is an excellent example of how compression can be achieved
but still be instantly recognised as the Festiniog Railway station. The
layout also offers interesting operating opportunities.
 Dduallt by David and Robert Waller
Most narrow gauge railway modellers are
more anarchistic and tend to build freelance layouts: what might have
been railways, often situated in real areas or even in places that do
not exist! The first freelance narrow gauge line of note was built way
back in the late 1940s by late P.D.Hancock; the Craig and Mertonford Light
Railway. It was a wonderful layout on a part of the Scottish coast that
never existed and it enthralled many of us for years!
Part of the fun of going freelance is that
you can include all of your favourite locos and rolling stock or even
design them yourself and then write your own history of the line to
explain how it all happened! And guess what? No clever clogs can come
along and tell you that you have the wrong number of rivets on the loco!
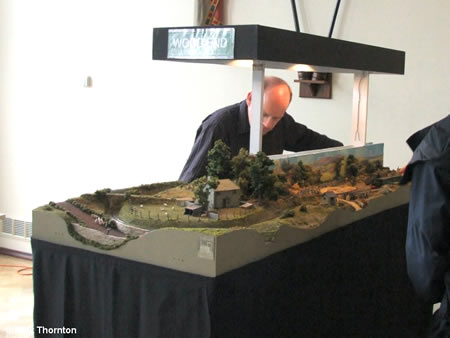
Some layouts are constructed around a
theme.

The superb Moorton Bottom Yard by Paul Windle which is based around a
working hydraulic wagon lift
photo Mick Thornton
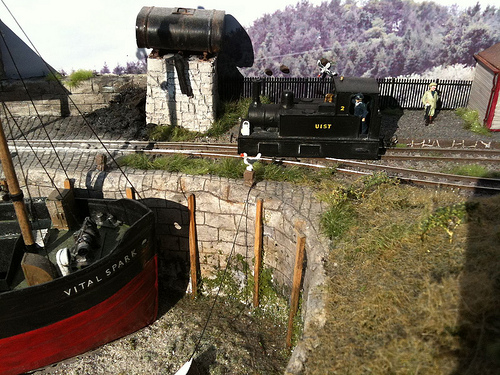
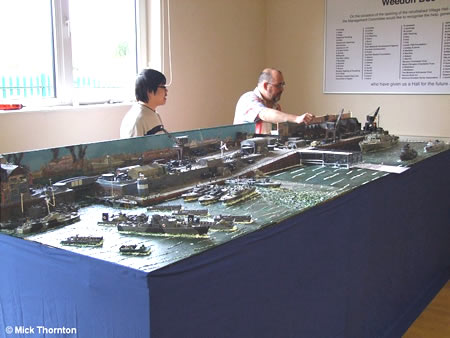 Andy Beresford with his Port Suzy. There really is an NG railway at the
back! - photo Mick Thornton
Andy Beresford with his Port Suzy. There really is an NG railway at the
back! - photo Mick Thornton
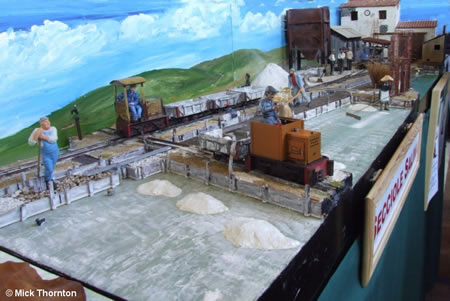
Gerry Bullock's Gn15 Secciole Salina
Your freelance line gives you the chance to
create your own little world where you can lose yourself whenever
you like.
 Narrow gauge perfection in a larger
scale. Punta
Marina by Henk Wurst
Narrow gauge perfection in a larger
scale. Punta
Marina by Henk Wurst
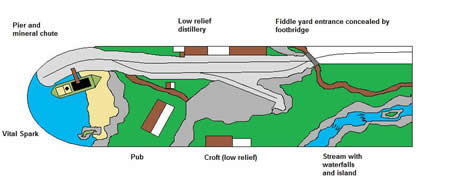
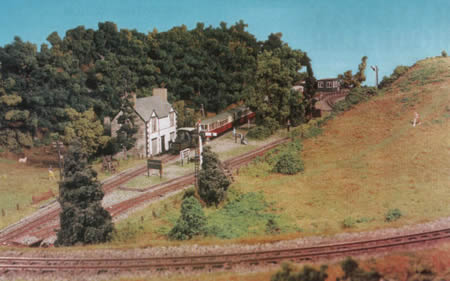
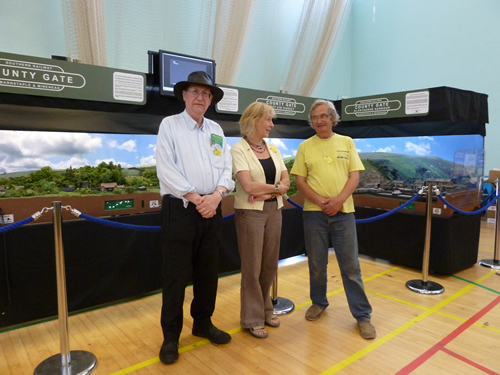
There is a half way house; an imaginary
extension of a real railway. County Gate is such an example.
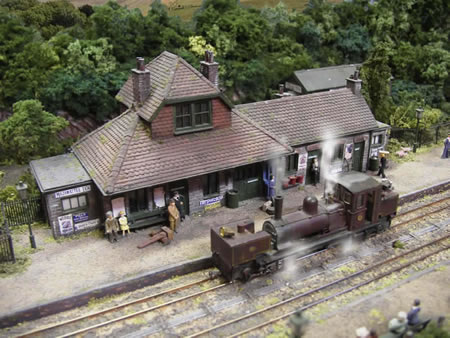
County Gate station - L&B
architecture but in a location that the railway never reached
You will have to decide how you wish to
operate your layout. Your principle interest may be to engage in
shunting manoeuvres, you may just wish to have a suitable environment to
display your rolling stock or you might like to watch your trains
running around or any combination of the above.
In general, there are two kinds of layout:
the 'end to end' and the 'roundy roundy'. A disadvantage
of end to end is that you will not be able to run in your new
locomotives. County Gate, by the way is both as the main line is
roundy-roundy and the branch is end to end. Most people have far more
rolling stock than they can fit on their layout. It is therefore
necessary to devise ways of storing stock out of sight. The most common
solution is the fiddle yard.
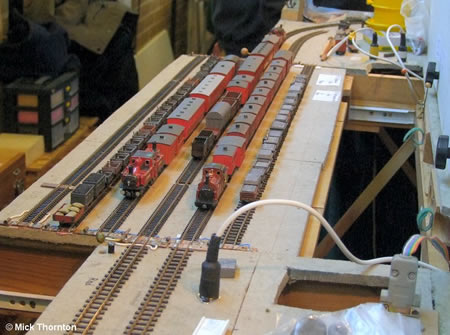
The fiddle yard of Tan-y-Bwlch by Angus Watkins - photo Mick Thornton
End to end layouts have an advantage that
they can be built on quite a narrow baseboard which may favour your
requirements. It does mean that you will be quite busy driving and you
will have to decide on what to do to run round locomotives at each end.
Such layouts may have fiddle yards at one or both ends. A few end to end
layouts may have modules built by a number of groups or individuals and
then assembled together at exhibitions. A great deal of discipline is
needed to ensure each section has compatible standards. This may be a
good way forward if you have limited space and you can find other
similar minded modellers to make other modules to join onto yours.
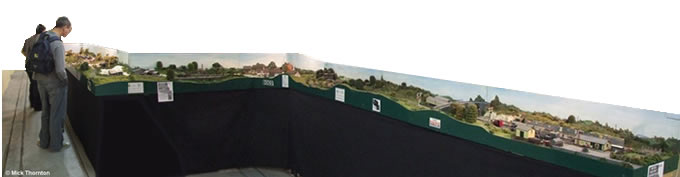
As far as the eye can see! Wimborne
Railway
Society monster 009 Tarrant Valley Railway - photo Mick Thornton
 009 layout of John & Jane Jacobs

Donegal by Alan Gee has hidden fiddle yards at each end - photo Mick
Thornton
Another solution is the end to end with two viewing sides. Wood End of
Steve Penn - photo Mick Thornton
Roundy roundy layouts will usually take up
a lot more room. Narrow gauge railways have an advantage of being able
to cope with tighter radii, but this may compromise your choice of
equipment. Some maintain their layouts as end to end at home, but have a
hidden loop which can be assembled at exhibition. Alternatively,
provided that one can live with tighter radii the layout may be
presented as an end to end but the track disappears each end into a
hidden rear loop.
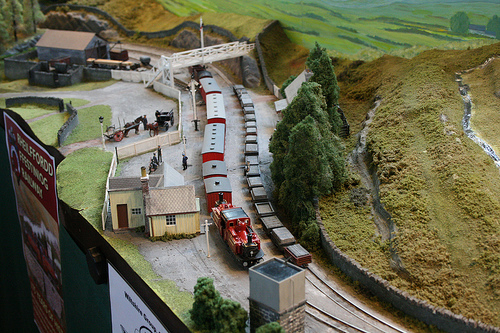 Tan-y-Bwlch by Angus Watkins has a rear
hidden loop
Tan-y-Bwlch by Angus Watkins has a rear
hidden loop

Access to the rear loop and fiddle yard is cleverly disguised here on
Tan-y-Bwlch by Angus Watkins - photo Mick Thornton
Some people prefer to build their layout as
a gimmick. Generally, while the standard of modelling may be very good
indeed, such ideas offer little scope for interesting operation.
A few model railways have been built on
ironing boards. Without question, in my opinion, the best narrow gauge
effort is by Tom Dauben and this was his first attempt!. Nevertheless, I
really look forward to seeing his completed 'proper' layout!
Dunbracken by Tom Dauben in 009
I suspect that this type of model began as
nothing more than a test bed to try new modelling techniques or as some
kind of ghastly joke. Sadly, the number of micro layouts has grown like
a rash. We can largely blame exhibition managers for this, as they keep
on offering prizes for these things. No matter how good the model may
be, such layouts just allow a train to go round and round; hardly
interesting after two or three seconds. Whatever floats your boat, I
suppose.
They don't come much smaller than this. Tuppenny Handley - Phil Savage
photo by Mick Thornton
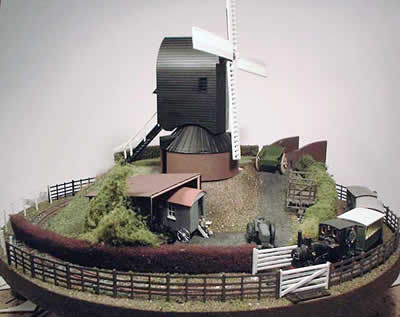
Black Dyke Mill; Chris O’Donoghue’s pizza based around a windmill
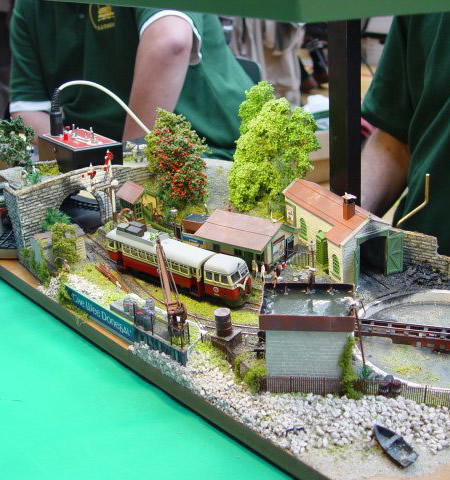 A slightly larger micro which does
offer some operating interest The Wee Donegal - Robin Winter
A slightly larger micro which does
offer some operating interest The Wee Donegal - Robin Winter
photo by Mick Thornton
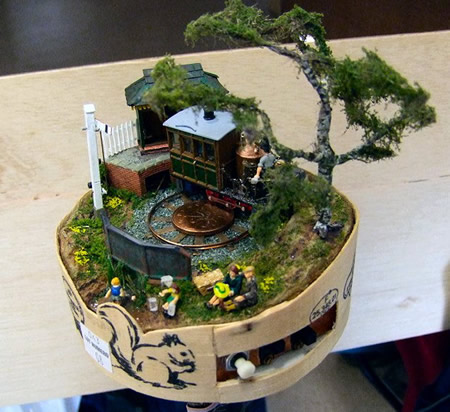
The list is endless; from railways in box
files to track on a sundial. One has to admit that some are very clever
but again very restrictive from the operating point of view.
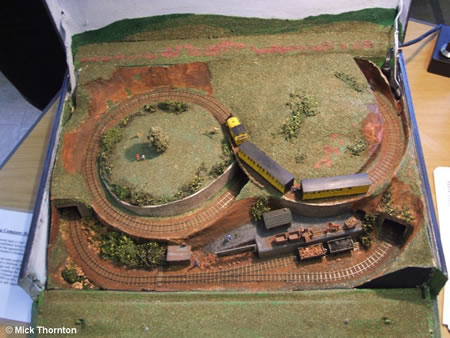
A truly tiny layout in Nn3 (6.5mm gauge, 2mm scale), The Exmoor Treacle
Mining Company, by Charles Wright. A full layout complete with
continuous run and a spiral in a briefcase! - photo Mick Thornton
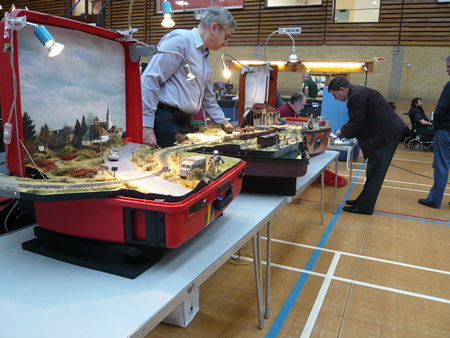
0-14 layout, Sucrerie Durand et Gault of Jack Treves which fits in three
suitcases. This is by far the best I have seen and even offers
reasonable operating opportunities
Some modellers have a smaller section of a
bigger home layout that they take to exhibitions.

One of my favourites is Minho Douro by John Cannons - a removable
exhibition section of a large permanent home layout
photo by Mick Thornton
Some model railways are built permanently
into homes. Personally, I would always caution against this as few
survive a move to a new house. It can also be very difficult to access
parts of your layout and of course, you can never enjoy the experience
of taking it to an exhibition and sharing it with many others. If you do
decide to make your layout portable, you will have to give some
consideration as to how each baseboard fits with the next. Track
crossing joints at oblique angles, for instance will be a continual
source of problems. Many modellers create scenic breaks between boards
to help hide the joints.
Narrow gauge railways are generally simple
in design but nevertheless, you will quickly find how large they
actually are when you scale them down. An accurate model of Boston Lodge
(Festiniog Railway) or Pilton Yard (Lynton and Barnstaple) would more
than fill the average room in 4mm/ft scale. The design will almost
certainly have to be compressed to fit your space and this has to be
done without losing realism.
You will have to decide on how your layout
is to be presented. Your best chance of getting realism is to use a
backdrop which comes round the ends. Please, Please remember that there
are no corners in skies! Some otherwise lovely models are ruined by
these. In 4mm/ft scale (009), a 6" radius does the job just fine.
 County Gate showing the wrap around
backdrop
County Gate showing the wrap around
backdrop
As you begin to design the layout, consider
all the possible viewing angles. It will have to look right from all of
them. If you intend to exhibit, also make sure that the height of the
layout is accessible to those standing as well as those who sit (and of
course children). If you prefer the layout higher at home, it is easy
enough to have extendable legs.
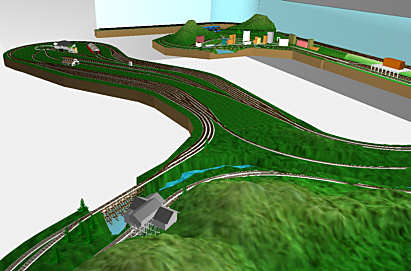
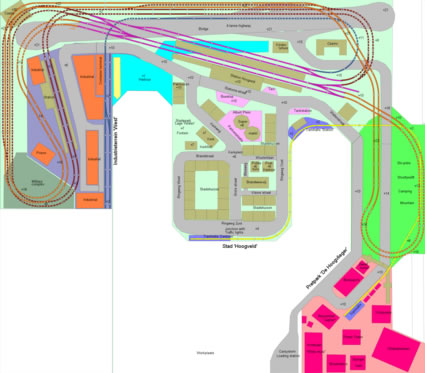
If you are computer minded, there are some
excellent model railway design software such as
Anyrail,
Cadrail,
Templot or
Trackplanning
. Some allow you to view the layout in 3D. Some are free
downloads while some you pay for.
Before launching into building, I always
make 'mini models'. The topography is carved out of foam and I make the
buildings out of balsa wood. I find it really helps to check that the
design works well. There are plenty of ways to plan full size too,
photocopying points to produce templates, drawing round one you already
own, or hunting down some online downloads. This will enable you to see
your layout full size and makes it easy to identify any areas you’d like
to change, as well as allowing you to position stock on it and check
that various movements etc. are possible.
When drawing out your track, remember to
maintain your minimum radii and choose as large as possible. Everything
will run a lot better if you do. Where possible, try to lay transitional
curves. Here, the start of the transition is at infinite radius and at
the end of the transition it has the same radius of curvature as the
adjoining circular curve, thus forming a very broad spiral. This will
reduce the risk of coupling lock and derailments.

The drawing above shows a
transitional curve (red) of track entering a spiral of fixed radius.
Personally I dislike track running parallel
to the baseboard. If it is at an angle, the scene always looks much more
dynamic. It is also nice to occasionally have the track disappear behind
something, even if this is just a tree or building. This is common
practice in the USA and adds to the fun of watching trains run through a
landscape.
When designing scenery, make sure that your
buildings and trees are properly to scale. Only too often, buildings are
modelled far too small. You may elect to reduce scale to the rear of the
layout, however, to gain more a feeling of perspective. Model things
from reality, not what you think is real. Have a look at photos of real
life examples of what you would like to model. You can then piece these
scenes together to make a much more convincing landscape if you look at
real life first.
The early design of the layout should also
include how you intend to light it. If you are to exhibit, it is frankly
essential.
Once you have finished your track plan, it
is always a good idea to post it on one of the major forums. This will
nearly always produce some very useful feedback.
So hopefully, this will give you a good
start. Taking your time to design the layout properly will save you so
much time and grief later.

|