|
Backwoods Darjeeling C Class Pacific
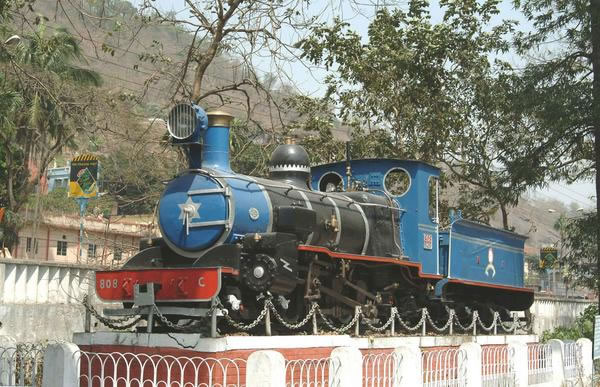
Plinthed
at the NFR headquarters at Maligaon, Guwahati in Assam
This is a locomotive I have long wanted to
model. Having spent quite some time in India during the steam days, I
have always had a great love of the locomotives. The locos were built to
operate the 2 ft line to Assam and of course never operated up to
Darjeeling.
This is yet another saga a learning curve
which has been extremely frustrating. I am obdurate in nature and would
never let a toy engine get the better of me but this time there were a
couple of moments when I was tempted to hurl the confounded contraption
against a wall!
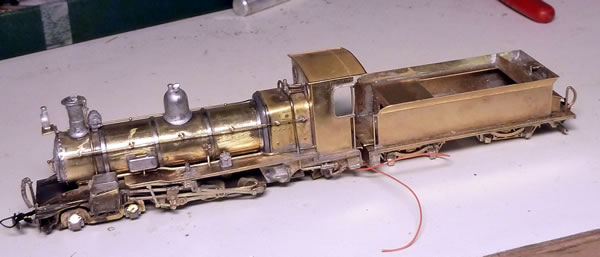
the Backwoods kit
My concern was the usual 'can it build up
easily?''. The answer is a resounding 'NO'. The loco does now operate
but frankly it has caused many problems and needs assistance as without,
it is incapable of hauling anything worthwhile and it is necessary to
modify the whole system.
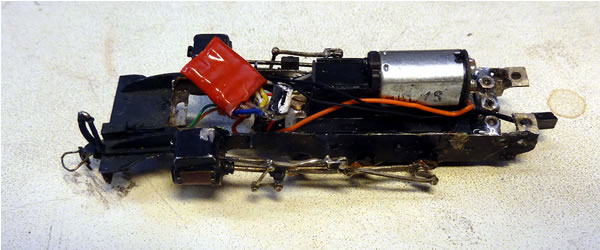
So what have been the problems? The kit has
its motor fitted into the tender and drives the loco axles through a
universal joint that easily becomes disconnected and loses huge amounts
of power. Insufficient weight over the drivers causes massive wheel slip
despite the weighted boiler and one of the Backwoods wheel sets have shown to have slight short circuiting.
All in all a most unsatisfactory arrangement. One day I may build
another one but this time it will be one of my 'fusions' and will use a
companion wagon to power the affair. The one huge improvement of this
kit is the provision of push on cranks which makes the whole job of
quartering so much easier.
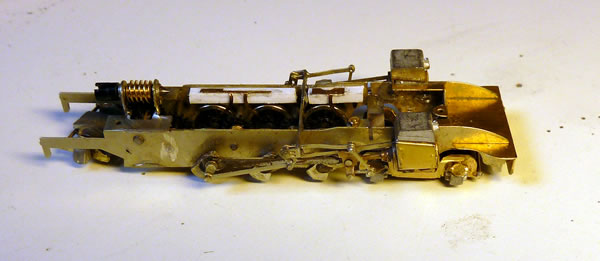
As usual, the kit is of high quality parts
for the most part and initial chassis construction went well.

the bare rolling
chassis

At this point the
chassis ran freely with few problems

The valve gear
assembled relatively easily but by then I was already thinking I would
be better off with Grafar class 08 wheelsets and Roco valve gear. There
is a complicated gear train that adds to the general resistance to
running.
This shows the chassis
complete with gear train, bogies and electrical pickups.
The chassis was run in
for a long period of time and finally it began to look as if I was wrong
and it would all work well.

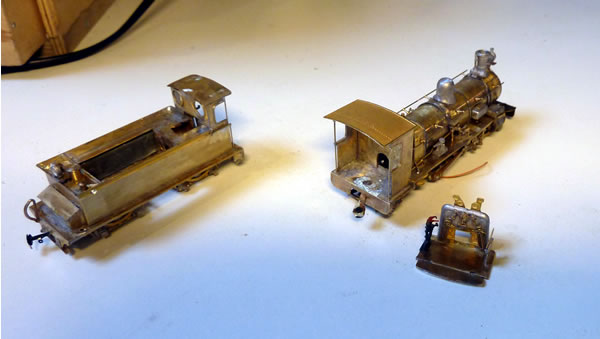
As with all Backwoods
kits, the body was a joy to construct
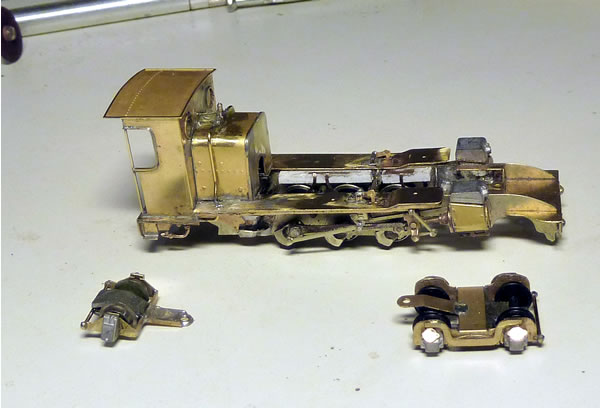

here the loco is about complete
I found the tender
harder to build than the loco and I have to replace the wheel sets which
were far too small flanged IMO.
The backhead is
complete and I have added a 'Blanch-style' tender cab which I felt would
have been needed in Devon weather.

This is now more or
less complete and ready for motor and shaft installation. I quickly
regretted not fitting working lights but the whole wiring exercise was
becoming a nightmare.

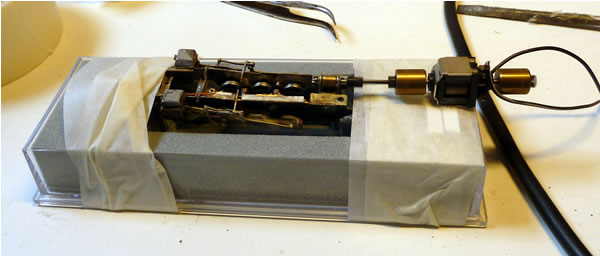
Here, the motor has
been installed and final running in is taking place. The shaft and gear
train already look troublesome.

After a complete
degreasing and ultrasonic cleaning the loco is primed.

Here, the wiring is
complete, the loco painted in Glenthorne maroon and the brass fitting
added.

And here is the beastie
fully lined, plated and lettered
20/20 hindsight
There has been intermittent shorting on
this loco and it has been finally identified as a short through the
insulated bush on one of the drivers. I decided to remove the Gibson
wheels and fit an unpowered 08 chassis and drive the thing from a tender
unit. I was able to source a bogie power unit that fitted very well and
in no time the tender was running around the layout.

The completed tender with motor removed,
bogies insulated with direct current pickup. The loco chassis has
gearing removed and the offending wheelset cut away.

The unpowered chassis from a Grafar 08
fitted with the correct Darj cranks.
So the build went together nicely and it came
the day to test the ensemble. It was attached to a powered companion box
car, this time a Glenthorne Fisheries CoOp white livery with bespoke
transfers. It worked 'more or less' but had a habit of derailing and
jamming the driving wheels rounding the end return loops.

The powered box van.

The Darj on trials which failed. Photo
Jeff Sydenham.
So what do I do now?
It was time to bite the bullet and fit a
power unit into the loco as well. This was a challenge as the boiler was
filled by a solid lump of white metal. It took five hours of drilling to
get it out, with lots of pauses to let the Dremel cool down!

The loco body drilled out (eventually)
Here the locomotive is now fitted with a 08
chassis and chip. This has taken four very long days!

and now to re-assembly
The problems have saddened me as it is by far
my favourite loco so far. However, after three attempts, the loco now
runs perfectly and is able to pull any load asked of it.
video


|