|
fitting DCC tail lights
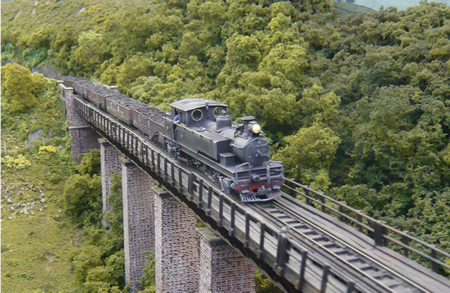
Without question, the addition of working
lights to our larger locomotives and railcars have really added to the
excitement of County Gate operations. The working lights are
particularly effective in the opened up tunnel under the hotel. It is also true to say that the
additional complications of wiring up these locos can take up to an
additional day's work.
Until now though, the red tail light at the
other end of the train has remained inop..
DCC Supplies
now stock the miniature train lamps produced by
DCC Concepts in
OZ.
The main chip, a Digitrax DZ125 remains in
the loco. This also operates the loco light, using function 0.
To be able to switch on and off the
carriage lights and rear lamp on the coaches, an additional chip is
required. This is a Digitrax TL1 single function chip. This is very low
cost luckily. Power for this is taken from the carriage track power
pickups. The chip is set to the same address as the main chip and
function 0 will be read, thus switching on and off the carriage lights
and rear lamp when required. We install a capacitor so that if there is
a short break of current, the lamp does not flicker.
The capacitors have a
silver flash which is alongside the negative
contact. The
common wire should be connected to the positive
side of the capacitor.
Fitting instructions for the TL1 can be
found here
 wiring schematic
 The first coach to be fitted. - click on
image to enlarge
The first coach to be fitted. - click on
image to enlarge
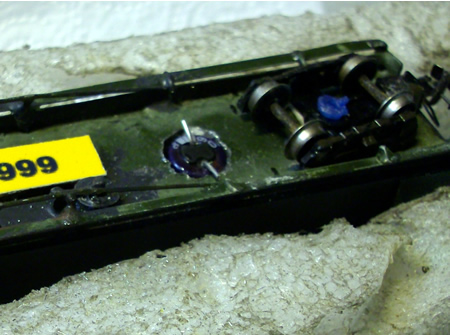 The first batch of capacitors are far
too big. Luckily, in this case, I was able to set it into the baggage
car.
The first batch of capacitors are far
too big. Luckily, in this case, I was able to set it into the baggage
car.
- click on image to enlarge
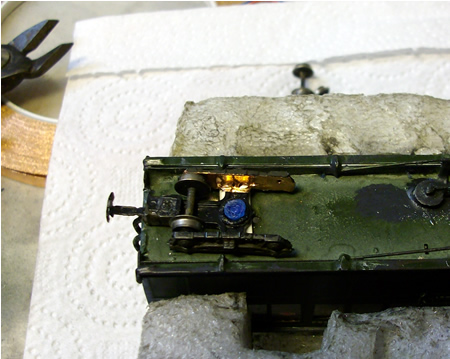
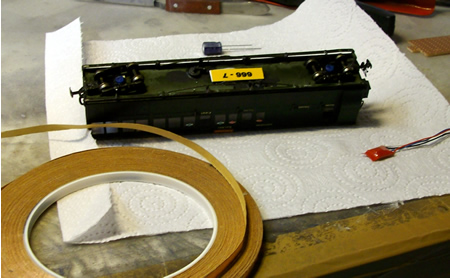
Self adhesive copper tape is attached to
one side of each bogie (opposite sides, of course) and the live wheel
fitted into the copper tape. - click on image to enlarge
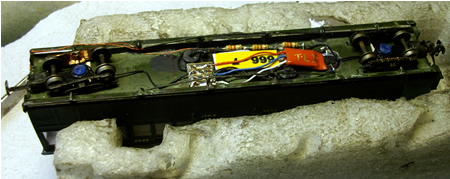 The chip, and other wires are connected
up. - click on image to enlarge
The chip, and other wires are connected
up. - click on image to enlarge
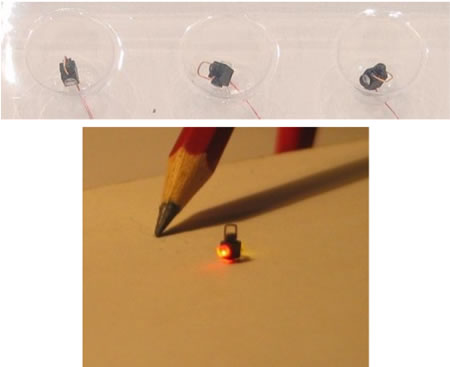
tail lamps
DCC Concepts in OZ produce tiny working
loco lamps. In the UK, they are supplied by
DCC Supplies
but at over £31 for six, they are definitely not cheap. We have found
the red lights seem to be very effective.
The wires of these lamps are very fine
indeed and require careful handling. They are in fact so fine, that in
many cases, they need not be hidden.
In order to be able to correctly adjust the intensity
of the light A resistor up to 10Kohm may be required..
programming
Once the installation is complete, place
the coach on your programming track. Do npt programme with track power
on. For some reason this stops the process. I have suffered from a
number of new chips that do not work so be aware that you may have to
return them.
I have also tried Digirails chips but they
will not programme using a Zephyr: go figure!
Set the loco address required (CV 01) and then set
CV 61 to 01 and CV 64 to 00 if you wish to operate the light using
function 0 and do not require transponding. If the light does not
operate on test, try reversing the white and blue leads from the chip,
as the LED will only operate one way.
Is it all worth it? For me, yes, as the
working light really does add to the scene.

|