|
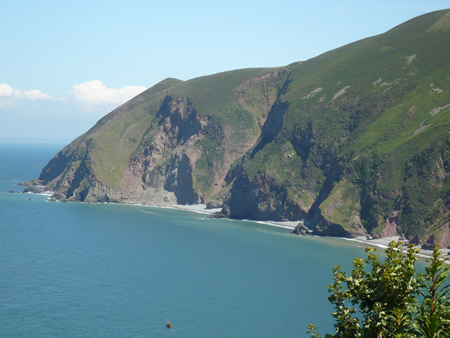
building the scenery of Glenthorne Harbour
The first thing to build is the cliff. Being
concerned with weight, we used blue foam, normally used for building
composite aircraft. Having stuck the lumps in place with a hot glue gun,
the shape was obtained using an electric drill with a 3/8" bit. It is
about the messiest job I know and it is not a good thing to do on a windy
day! For days we will find blue foam granules, in the toilet, sofa, corn
flakes and cat!

punishment of foam with a 'Black and Decker Devon cliff maker'!
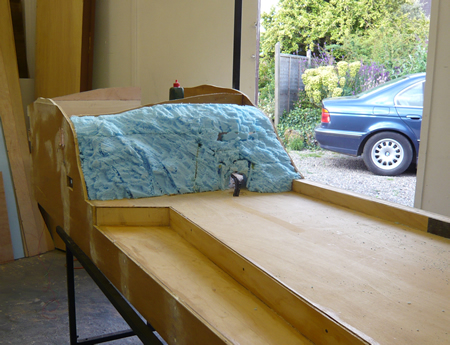
the cliff ready for coating
Once satisfied with the shape, the cliff is
then coated with Polyfilla. This we mix to a consistency of double cream
and brush on in the direction of the rock strata. We use a very short
bristle brush for this ( a 1" throwaway cut down with scissors). When
nearly dry, the Polyfilla is again brushed to knock off any nibs.
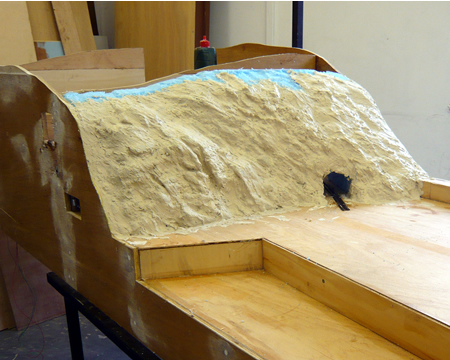
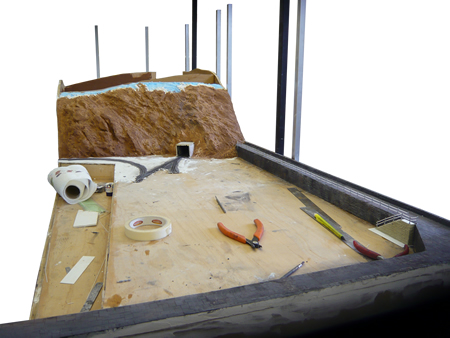
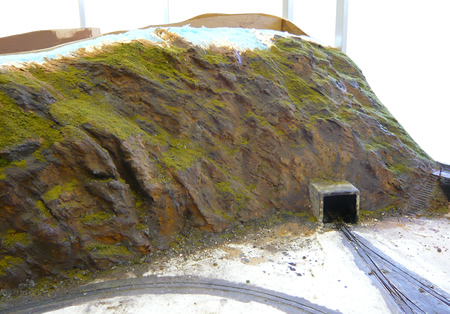
The surface treatment of the cliff. Some work is still needed on the
tunnel portal.
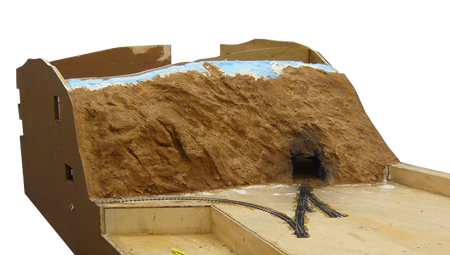
After a wash with thinned brown emulsion.
There is still much carving and detailing to be done. The tunnel entrance
will be fitted with a concrete rock shelter. - click on image to enlarge
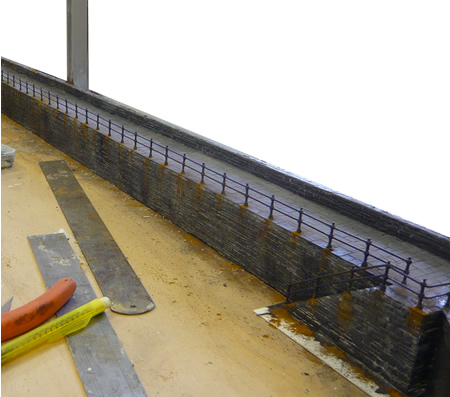
The outer sea wall is largely complete and
railing are being fitted. - click on image to enlarge
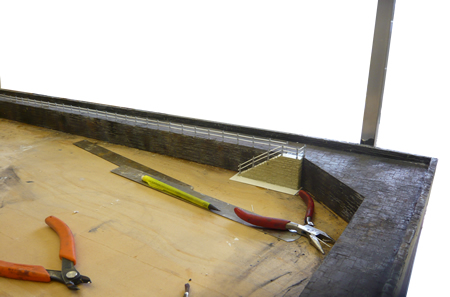
steps up to the wall
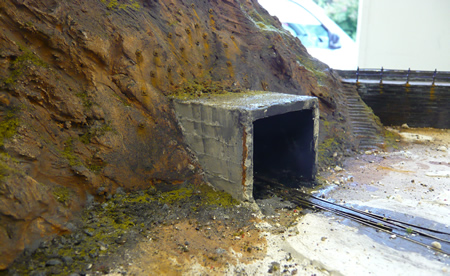
The rock shelter was made in foam sandwich
and the exterior varnished prior to coating with a thin layer of Polyfilla.
Shuttering marks were made using a 6" engineers rule. One corner shows a
re-enforcing bar that has frosted and broken out. This was a common
problem with early concrete structures. The rock bolts (Grandt Line) can
clearly be seen.
click on image to enlarge
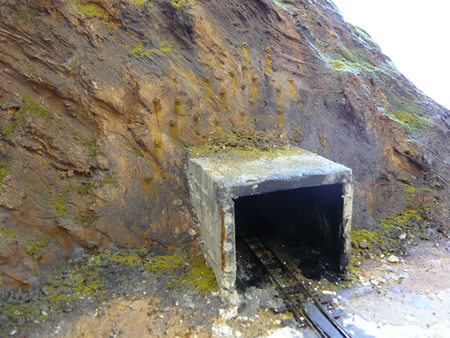
another view of the rock shelter - click
on image to enlarge
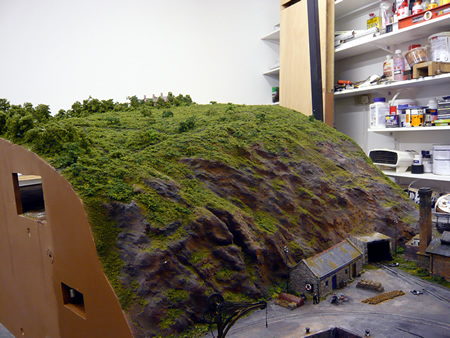
the completed cliff face
- click on image to enlarge
The next job was to attach talus to various
places on the cliff face with PVA. The cliff face was then finished using
rather a lot of weathering powder. Great care was taken to get the right
rock colour. A small area at a time was wetted with water and the power
applied with a radiator brush (these just seem perfect for this). A lot of
applications of powder used rather like paint. The result was treated with
artist fixative.
PVA was then brushed onto vegetation surfaces
and scatter applied. The whole was then liberally sprayed with artist
fixative.
harbour mole completed and railing painted blue and then rusted
- click on image to enlarge
The top of the cliff was then added. This was
done by using two diagonal layers of ModRock (1" overlap) supported over
card formers. The next day, the edge of the ModRock was trimmed back with
a sharp knife and attached to the edge of the plywood with good old
fashioned tin tacks spaced at every inch. We have given up using a staple
gun as it damages the ModRock and one's hands too much!
A thin layer of Polyfilla was then added over
the ModRock to smooth out the contours as we desired and this was finished
with a wet paint brush. Once gone off, a final lay of ModRock was added. I
think that the sandwich construction gives best strength to weight ratio.
A final very thin coat of Polyfilla is brushed over this to complete.
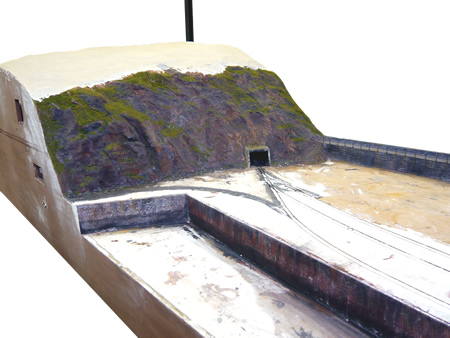
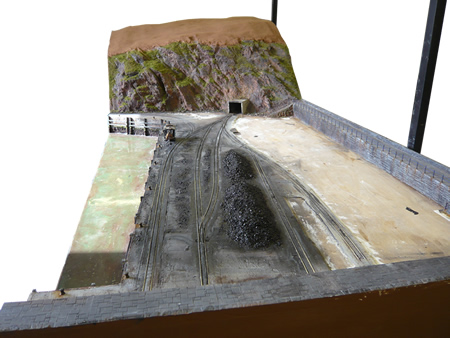
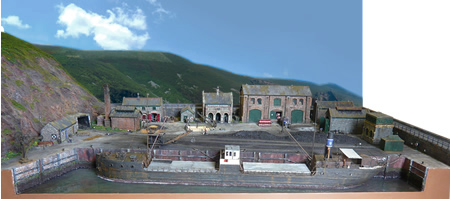
The harbour walls are in and the top of the cliff made - click on image to
enlarge
The harbour wall were made using Wills sheets
expoxied to the timber framing. The wall near the cliff is random stone
and represents the original small fishing dock which existed prior to the
expansion into Glenthorne Harbour. The brickwork of the dock is very
weathered as this is where coal is continually offloaded. The top to the
Wills sheets is level with the rail head. The brickwork was extended onto
the plaster by the use of a scribe in order to create a 9" edge brick
capping. The tide line has been added at this stage but seaweed and
mussels will wit until the timber groins are added.
A useful tip, if you ever want really worn
and distressed model wood, soak the parts in an enzyme called 'lignase'.
This eats away lignin. Remove and wash when the erosion is to taste. If
using balsa wood, the enzyme 'cellulase' will first remove the more
'pithy' element. The enzymes are not too hard to get from a scientific
supplier. Deeply fissured timber can be modelled in this way. I also use a
steel wire brush in a Dremel to distress end grain, as in the tops of the
timber piles.
The timber is first painted in matt black and
then the surface colours are dry brushed. Wood is rarely brown in colour,
unless it has just been creosoted. The nail holes on the horizontal
rubbing strakes are added once the structure is assembled using a dental
pick and rust colour added. One strake has become detached and the nails
remain in the pile, represented by fuse wire with a tiny blob of epoxy at
the end to represent the head.
The seaweed has been added. A thin line of
green Ulva at the edge between sea and air and bladder wrack (Fucus
vesiculosus) and Chondrus
crispus below. The nails can just be seen that attach the rubbing
strakes. Seaweed is rarely modelled correctly on dock sides. The brown
algae begin about a foot to 18 ins below high water as it is more
efficient in photosynthesising below water.
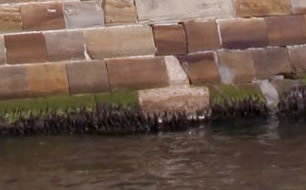
the sea wall at Whitby
I first paint a line of PVA for the green
algae. I guide the level by resting the brush horizontal on the edge of a
piece of wood the correct height. A few small squiggles are just fine! The
baseboard is then placed on its side and Woodland Scenics 'blended turf'
is sprinkled on. This is just the right colour. Once this has dried,
I then painted the rest of the wall down to the bottom with a liberal coat
of PVA. This is sprinkled with grey fine chopped foam. The baseboard is
the put back to the horizontal the the PVA/grey foam mix is very lightly
brushed downwards with a soft, wet sable brush. In a few places, the wall
will again be exposed, which is how it ought to be. Once this has dried,
excess is removed using a dental pick and the surface wet brushed with the
correct reddish brown paint. Some of the grey colour shows behind which is
also correct. The brown colour is allowed to spill onto the 'sea bed'.
If you are modelling mussels, these can be
made from very small round seed and painted semi mat black and added where
needed. I felt Glenthorne was probably a bit too hostile for mussels!
The rest of the sea bed was painted while
this was still wet using browns and greens, 'well mottled'. If there is to
be a transparent sea finish, don't forget that some ships will ground a
bit now and then at low water and leave marks. Some will be thin and well
defined, where the end of the keel or rudder has scraped. Where the keel
has touched along its length there will be thicker dark lines, represented
in the photo below by horizontal brown splodges!
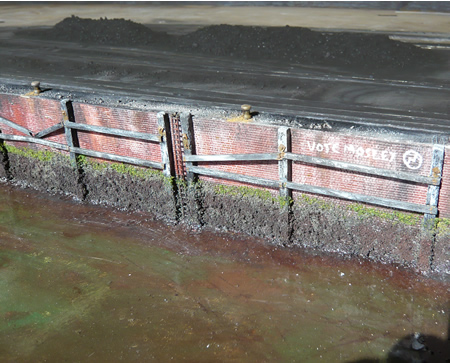
the
coal wharf walls finished with a rather uncomfortable reminder of the
'Black Shirts' of that era. The lines under water will represent keel
scrapes once the water has been built up. At this point, only one coat of
'water' has been added.
- click on image to enlarge
The water starts off using West two part
penetrating epoxy. This cures rock hard in two hours and covers very well.
I brush it up a little onto the seaweed to represent wetting. I will apply
three coats of this, (each about 1mm thick). This is as far as I can go at
this point until the ship is in place. The rippled surface can then be
added, by working the surface with a brush while the epoxy is beginning to
get a bit stiffer. The surrounding concrete was treated with grey weathering powders
and brushed with a stiffer square ended brush to simulate a yard brush. I
use Carrs weathering powder in profusion. This is stabilised using artist
fixative.
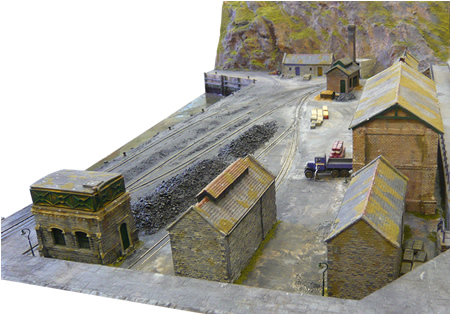
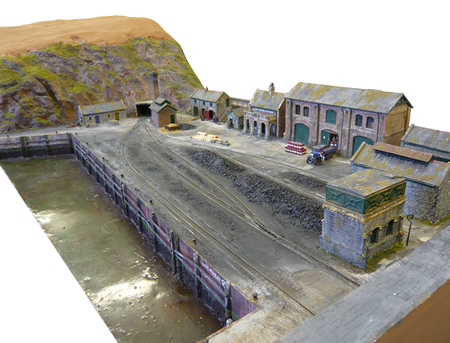
The bollards and coal piles are in and the first coat of 'water'. The
finish round the coal hopefully represent coal dust which has been
brushed. - click on image to enlarge
The coal piles were made in Polyfilla with
coarse and fine ballast pushed in. The piles were then slightly scattered
with very fine ballast and the whole lot fixed with dilute PVA with a few
drop of detergent. Once dried, I airbrushed the whole lot black. The
surface was then lightly painted with semi matt black (chaos black) to
give the coal a slight sheen.
click on image to enlarge
click on image to enlarge

click on image to enlarge
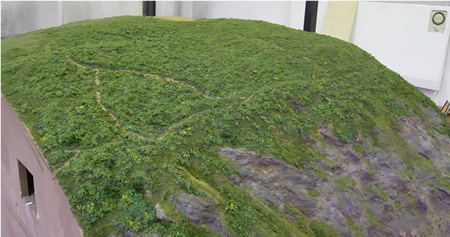
Work then moved on the the finishing of the
cliff top. Much is a mixture of heather, (not in flower in June), bracken
and gorse. To show the new growth of heather over last year's dead wood, a
dark grey clumping was first added which was then covered with green
clumping. Gorse flowers were represented using yellow weathering powder.
Small paths are modelled by scraping away the scatter.

Small windblown shrubs are added later. These
are sea moss trimmed to shape.
click on image to enlarge
click on image to enlarge

|