|
Building the production
railcar (304 -305)
The last two railcars to be built for the
railway were delivered in 1935. They were four car sets, and this time
were not articulated. All railcars were built in aluminium in order to
reduce weight. Apart from car 302, they were left in bare aluminium with
a green waistline down the side.
The four coach set
reverted to side cooling.
The four coach set numbered 304 was presented at
the 1934 Paris Salon where much to the pride of Eastleigh, it won the first
prize for transport innovation.
The County Gate railcars are a logical
progression of development that one would expect with such an innovative
design.
The prototype No 200 was steel built and while
successful in the main, showed several design flaws.
The second prototype
railcar (201) I built was my first attempt to really capture the art
deco style of the era. It was built when I was rather unwell and I used
materials at hand, which were frankly not always ideal. In the end, I
finished it with some fancy paint which was supposed to burnish into
metal. It did not. The paint did not dry properly and eventually when I
finally did try to burnish, all I got was a lot of small balls!
Eventually, in disgust,
I scrapped it and used the chassis under railcar 302. Even the seats and
passengers were recycled. My actions resulted in a few rather cross
emails. Clearly, the unit had gained some fans!
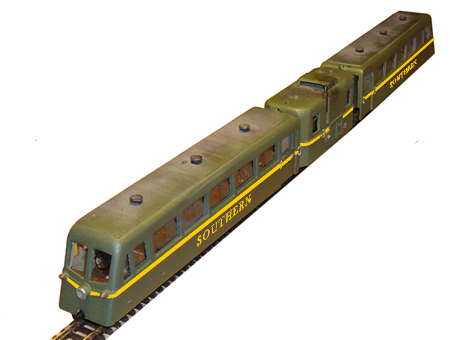
The first series of
'production railcars included unit 302 and this is still employed on the
line.
302 prior to application of decals
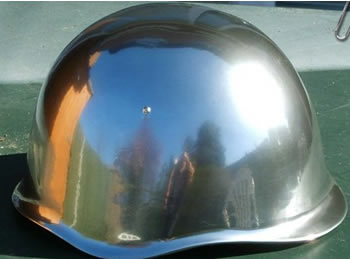
I wrote a thread in the
NGRM forum about my dislike for so called brass paint slapped on
locomotive domes. This led to some very interesting posts concerning
other techniques for replicating metal finishes. Out of this, I began to
research what was actually available these days and settle on a company
called
Chromed Up. What I was looking for was polished stainless steel. I discovered that this could be achieved by
using a lacquer over the chrome. The photo from Chromed Up is an
example. A bit different from the wretched paint on poor 201!
Following my past
failure, I was not too keen to try this myself and eventually I managed
to persuade Steve Merton to do the application himself. More of this
later.
Now, most of my rolling
stock is green and rather weathered. In a very green landscape, I
thought a shiny new polished railcar would be a real piece of eye candy
for those watching in exhibitions. This was the start of the new project
that has taken over a month of full time work. This meant that I was
really trying this time! Previous railcars had taken only a few days to
complete.
Inspiration came from
France and the USA.
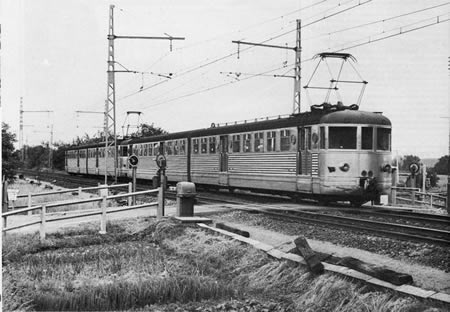
a French car of the period
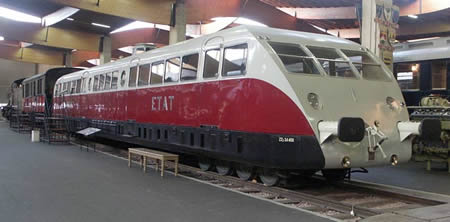
1931 Bugatti PLM railcar
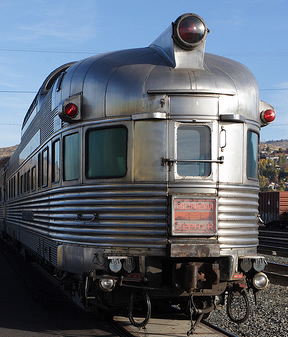
and from the USA
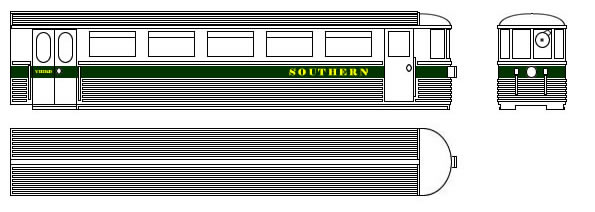
Gradually a new drawing
took form. Below is the first design that began to look right.
Small details began to
be developed such as these lights.
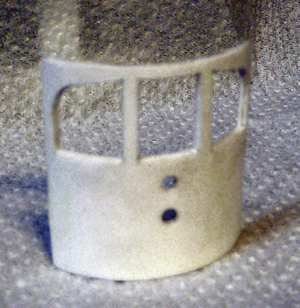
The curved ends were
formed using three layers of very thin Plasticard. These were formed
over a bottle of the correct radius and glued together using high
penetration superglue. The end result was very still and stable.
The corrugations are
made from a sheet of Slaters corrugated iron. This is an excellent clean
moulding. A strip was warmed and attached with superglue. The headlamp
casings were also added. These are drilled to take 2mm lighthouse LEDs.
The roof profile is formed using soft sand car body filler.
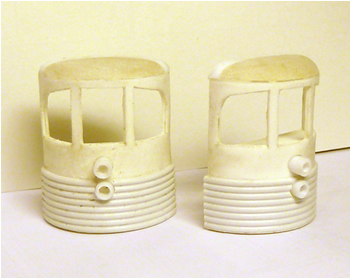
Below are the completed
ends, sprayed with Humbrol grey plastic primer. This is an excellent
paint, by the way.
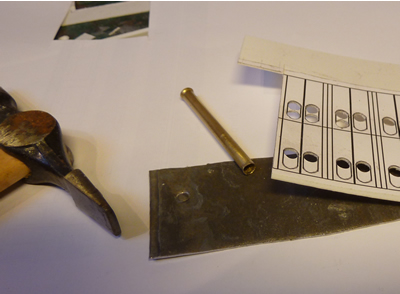
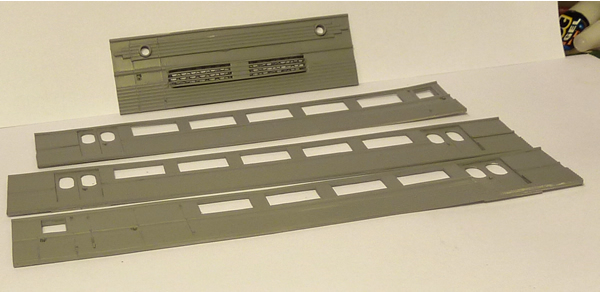
To transfer shapes onto
plastic sheet, I print the designs onto photo quality paper. These are
stuck onto the plastic sheet using 3M spray mount. It makes life so
easy! The windows are stamped out using chisel blades ground to the
correct widths. This gives a very clean cut. Below are some sides
including the 'Odeon' style motor car.
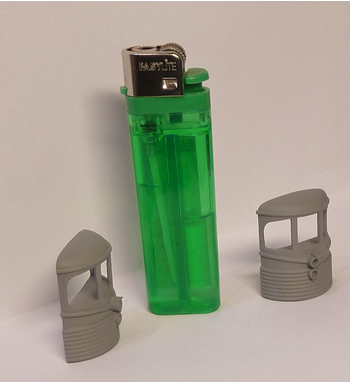
The oval door windows
were cut out using a brass punch made from tube section.

The sides are of
sandwich construction so they will be extremely rigid once complete.
I then began to assemble the coaches.
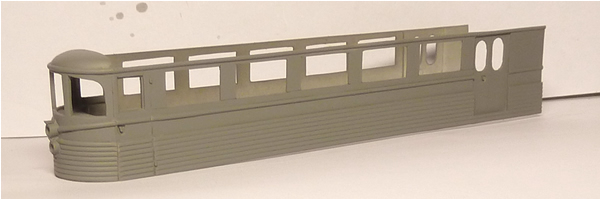
The chassis come from
some N scale Grafar coaches I bought at a sale for £1 each. They are cut
in half and attached to thick plastic sheet which forms the floor.

the railcar well under
way - click on image to enlarge
I bought a brand new
Bachmann bo bo chassis and what a fine running unit it is too, fitted as
it is with two hefty flywheels. It is completely silent. These are NOT
DCC ready. This means that they have to be taken apart and the metal
chassis ground away around the motor brushes. The system runs on the
split chassis system.
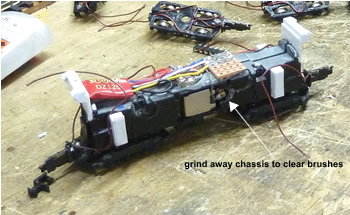
click on image to enlarge
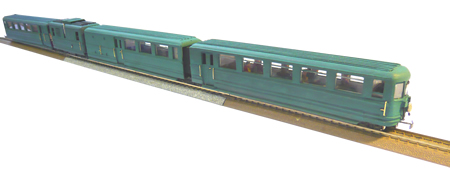
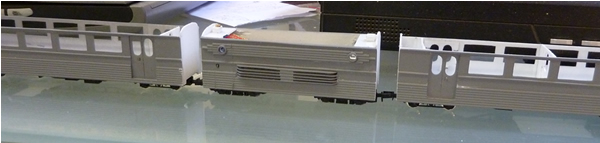
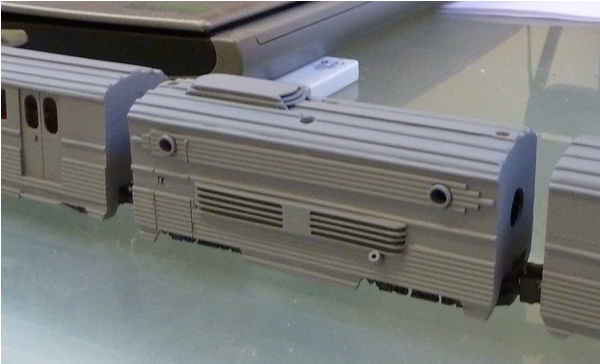
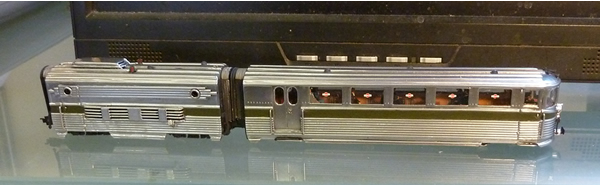
Below is the set
including the traction unit.
The rocker panels were then fabricated and
attached. I am using half round beading for the finishing.
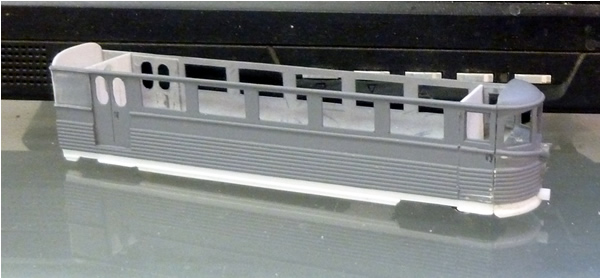
click on image to enlarge
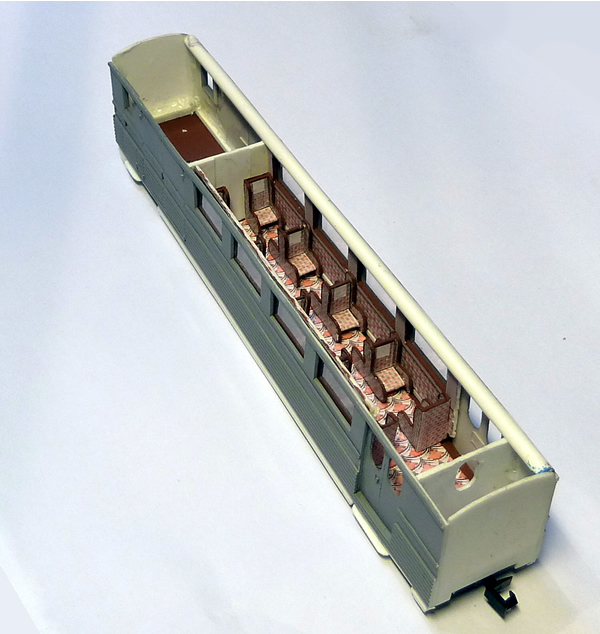
The interiors were also
designed as art deco. New fabrics and floor surfaces were designed and
drawn and again printed out on photo quality paper. The coach interior
sides were also built at this time. The fabrics were attached using
superglue and the surface was also treated with this glue so that the
printing became integral with the plastic sheets. Below, is the first
class interior with the interior panels just located loosely.
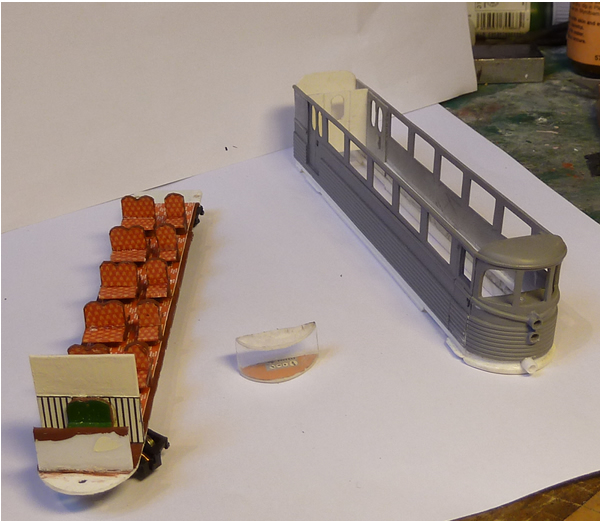
The second class seating
The time then came to
build the roofs. First, half round beading was carefully attached to the
coach side tops. One can be seen in the photo above. The ceiling was
then glued it between the half round sections. The coach now begins to
become very rigid. Care is needed at this time to ensure that there is
no twist in the carriage bodies.
A larger half round
section is glued down along the centreline and the roof is formed using
bodyfiller. I use a former to scrape off excess filler.
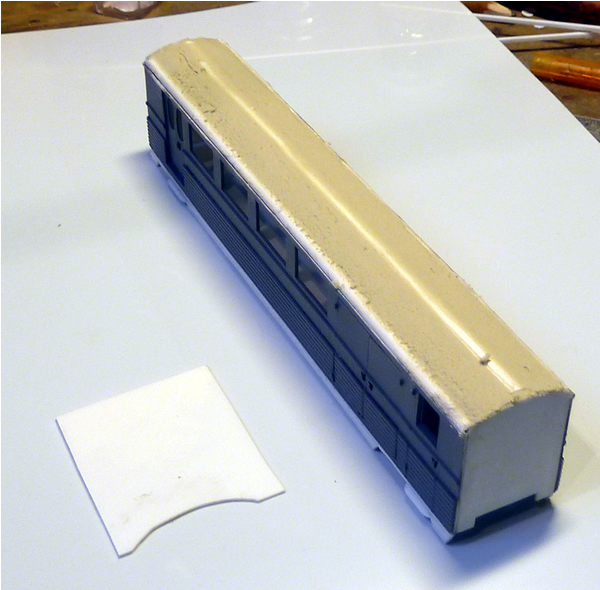
After about three coats
of filler and careful sanding, the roof shape is completed. The carriage
is now primed again and very carefully sanded with 400 paper, down to
600 and then Micromesh. In awkward corners. I finish using a fibreglass
pencil brush. The corrugations were then added to the roof using half
round Plastistrut sections.
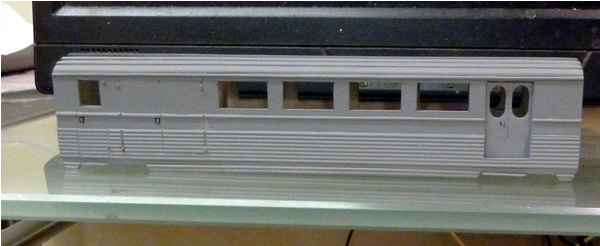
The first class car nears completion
I then took a trip to
see Roger Keen (Keen
Systems) who lives in Market Drayton. He is a retired radar expert
with the RAF but just cannot quit working. He has made the close
coupling of rolling stock in 4mm scale a crusade and has developed all
kinds of clever gizmos.
After we had discussed the requirements, he trotted out couplers which
also included electric transmission. Some were for four wires but were a
tad bulky and as I shall run this railcar in one direction only, we
settled on two wire transmission. These are neat units supplied by
Fleischmann. The first job therefore was to remove the original couplers
and replace them with these. They were attached by 10BA screws and are
allowed to rotate. I had to cut away a bit more of the coach ends to
accommodate them.
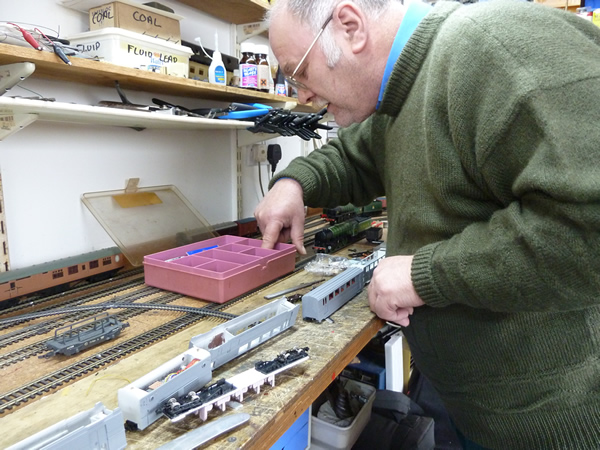
Roger gets stuck in
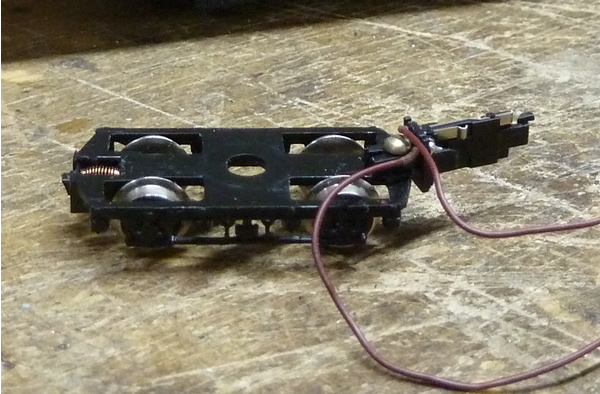
A Farish bogie with the new coupling
system
The next job was to fit
the corridor connectors. These are in temporarily as they must be
removed prior to the chroming. These are very simple to fit BTW.
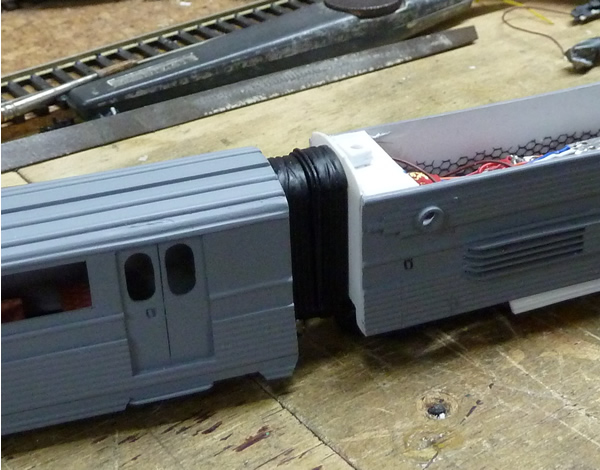
The faceplates have to
just touch. These are sprung, BTW. This meant that the bogie position
had to be changed on two coaches. This is critical for the thing to work
properly.
It took most of the day and Mrs Keen kindly supplied teas and excellent
bacon butties to help keep our spirits up. I am delighted with the
result and thanks indeed go to the Keens. I am sure that FR/RhE folks
would find a system which would work from Roger.
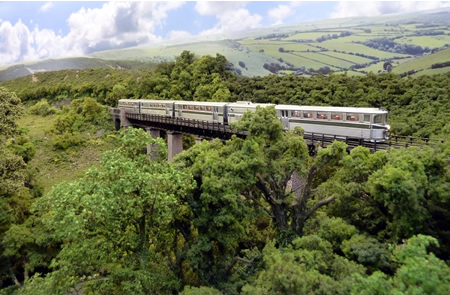
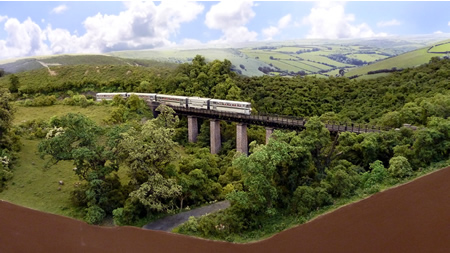
The set was tested on
County Gate and I was pleased to see that it all worked in both
directions without binding. Final detailing was then completed,
including attaching archer transfer rivets where appropriate and grab
rails. The bodies were then promptly sent over to Chromed Up.
I then set about wiring
up the chassis including temporary lights and the 'fully air
conditioned' railcar was tested again on County Gate, It was properly
programmed and I am glad to say that it worked perfectly in our
automation programme.
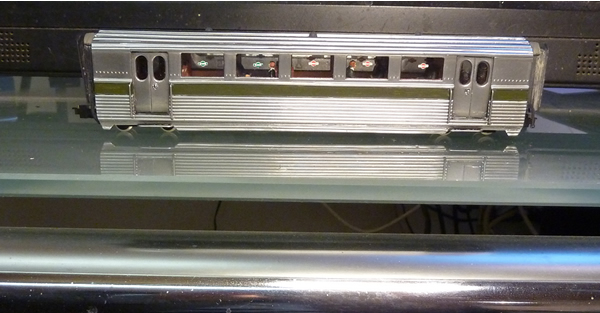
the strange site of the 'fully air
conditioned' railcar running on the layout
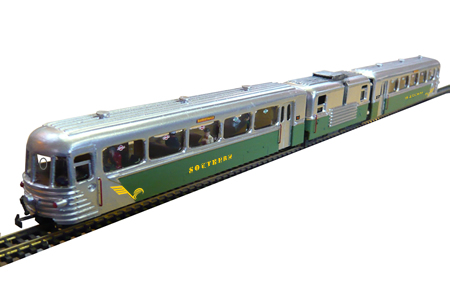
The bodies were sent,
with some trepidation to
Chromed Up. I need not have worried. They came back in a few days
looking absolutely wonderful. Final assembly took about one day for each
car and I have to say, the result exceeds my expectations.


|