|
Building the harbour branch railcar
no. 100
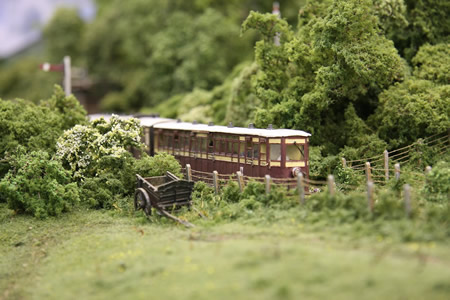
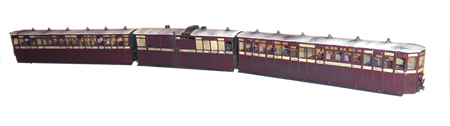
the railcar descends to the harbour
The plans to re-instate
the summer passenger service on the Harbour Branch for the 1928 season,
presented the Harbour Authority with a number of problems. The removal of
the run round passenger facilities both at County Gate and the harbour
meant that another solution had to be found. The six original coaches
belonging to the Authority had been in storage since 1914. Two were
modified to include a driving cab which was added to the coach by
extending the frames.

As progress began to
replace much of the main line service with diesel railcars, the Harbour
Authority decided to replace steam operation with a power car. The power
car was again built locally and employed two Gardner engines with
mechanical drive to the wheels. A complicated air control system was
installed between the cabs and the power car. Unlike its main line
equivalents, articulated bogies were not employed. This turned out to be
fortuitous as the power car remained troublesome throughout its life and a
steam replacement had to stand in on many occasions.

The railcar became very
popular during the summer as the branch had now become famous for its
spectacular views.
A few of our coach etches
had become slightly damaged when sent to customers and had been returned
for replacement. This was actually the start of this project as it seemed
such a shame to do nothing with them. I was also keen to provide trains
which were more visually different for exhibition use. What better than
this for the harbour shuttle service? As the trains enter the tunnel more
or less at right angles to the public viewing angle, this time the
lighting will be working, as our chips allow for this facility. We are
using dual colour 3mm LEDs from DCC supplies.


The coaches were built
from two damaged frets for L&B coaches
SR2473/2474
and one fret of
SR2469/2472
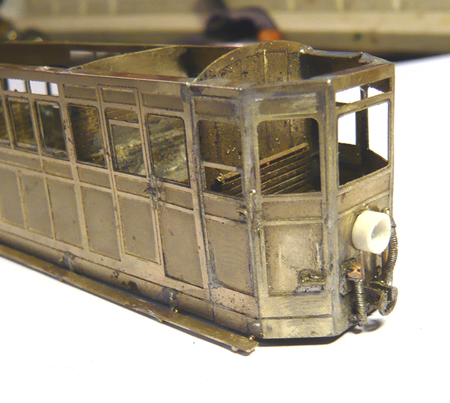
the driving cab
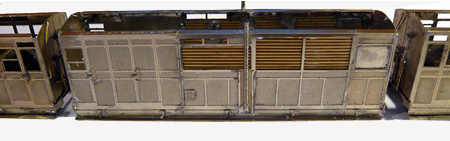
The power car, also made from 'bits'. The
vents are made by soldering brass rod on the inside. - click on image to
enlarge
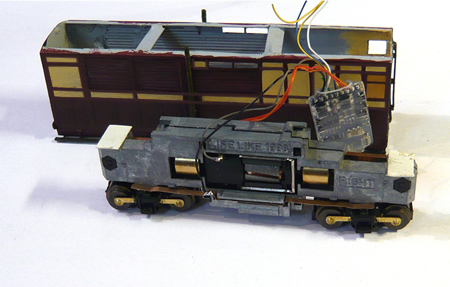
the Lifelike chassis ready for
installation. The plastic bogie sides have been removed to allow for
sufficient movement within the body. - click on image to enlarge
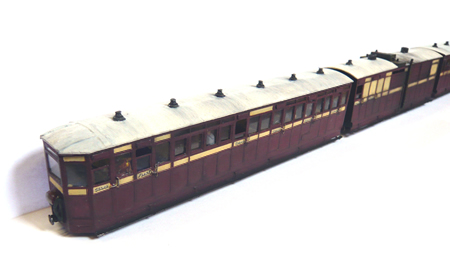
completed railcar set - click on image to
enlarge

Well, the build was fast
enough but we did have problems getting the lights to work. The lights are
switched on using function 0 on DCC. The instructions suggested that the
resistor be fitted to the common blue anode wire from the chip. However,
when the white light at one end was connected to the red at the other,
only the red lights worked. By trial and error, I discovered that by
adding additional resistors to the red light balanced things out and we
were able to get a red and while light working at the same time.
The lights are brighter
than 'scale' but I am quite happy with this at exhibition. The resistors
do get hot, so we make sure that the lights are turned off when the
vehicle is stationary.

Note that we discovered two wheel sets on the
Lifelike chassis that were not to gauge. While easy to adjust, all drive
wheels should be checked for back to back measurements.
The Glenthorne branch has several long
tunnels and there is a considerable distance which is cut into the sea
cliff face which exposes stock to salt air. The railcar was built out of
coaches built in 1910 that had been in storage for some time and some
timber soft spots had inevitably appeared. Following the construction of
the railcar, the paintwork quite quickly became a bit dilapidated. Due to the unreliability of the
'home-grown' power unit, steam was sometimes used while repair was
underway.
The painting hopefully reflects this.
The railcar was first spray painted with
automotive acid etch. The coach was then hand painted using acrylic
'Crimson Lake' and early BR cream. If we had wished that the coach looked
pristine, I would have waited 48 hours for the paint to harden and then
rub out brush marks and any nibs with a 2mm glass fibre pencil.
As we wished some weathering and soot, the
whole coach had dark grey weathering powder brushed over it while the
paint was till 'green'. The powder combines a little with the surface of
the paint. After waiting 48 hours, we then used the glass fibre pencil and
cleaned up the brush marks and some of the weathering powder until we had
obtained the required effect.
a trailer car following weathering and 'cleaning' -click on image to
enlarge
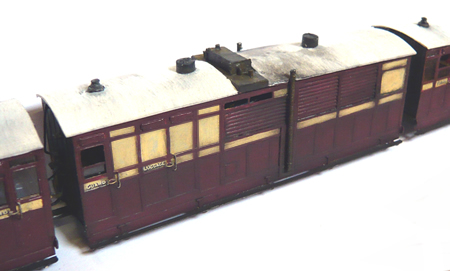
the power car following
weathering and 'cleaning'. some of the cream areas can be seen to have
peeled away completely. -click on image to enlarge
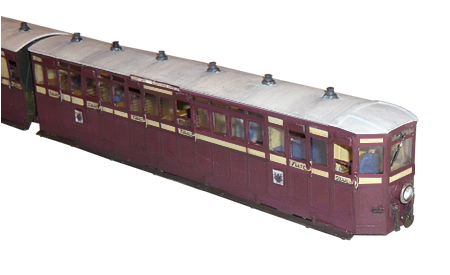
trailer fitted with
crests and destination board, chrome rim around light and windshield wiper
-click on image to enlarge
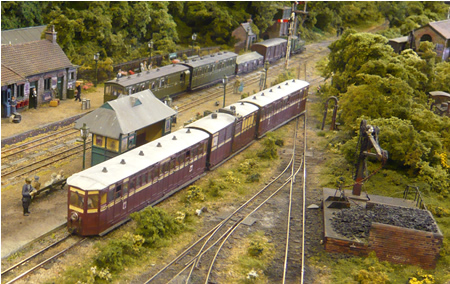
the railcar arrives at its bay platform
The chrome ring around the headlight was made
by wrapping round 3 turns of 3amp wire on the round plastic tube used for
building the light body and soldering the wire into one piece.

|