|
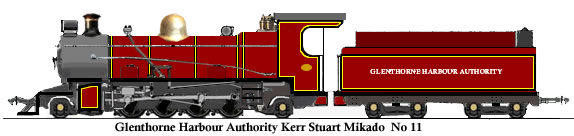
Building the Gwalior style Mikado
see movie of this loco in action
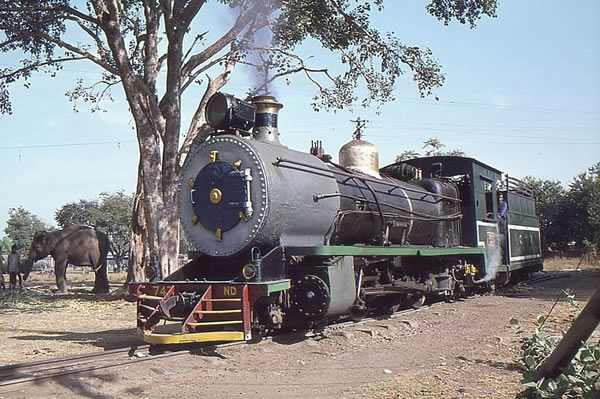
The Mikado
in its natural habitat.
This saga is about the learning curve one
has to go through when making such radical changes to a stock chassis.
At first I thought I could power the loco from the tender alone.
Experience has shown that this method makes the loco more prone to
derailment and the final evolution uses a powered loco twinned with a
power tender.
When I lived in India, I had
the opportunity of driving a Gwalior Mikado for an entire day. These
magnificent locomotives no longer trundle along the featureless plains
of that state hauling long over-crowded passenger trains. The track has now been
re-gauged to broad and the one or two survivors slowly rust away on
plinths. I wanted to capture this awesome prototype but produce an
English version of it.
I also wanted to show that one can scratch
build brass locos with the minimum of tools in the 'spirit of John
Ahern' who trod this path over half a century ago.
Experience with building the Backwoods
Miniatures Darjeeling Pacific showed that it is impossible to get
sufficient ballast into the locomotive to expect acceptable traction
when using on the demanding County Gate and Cliffhanger layouts.
I wanted to get on with this project while
I had the time but quickly discovered that there was a big delay in
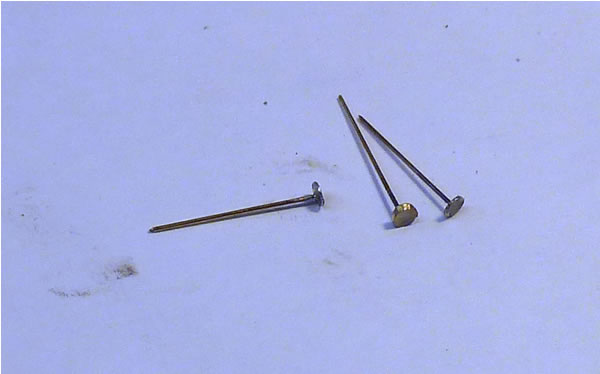
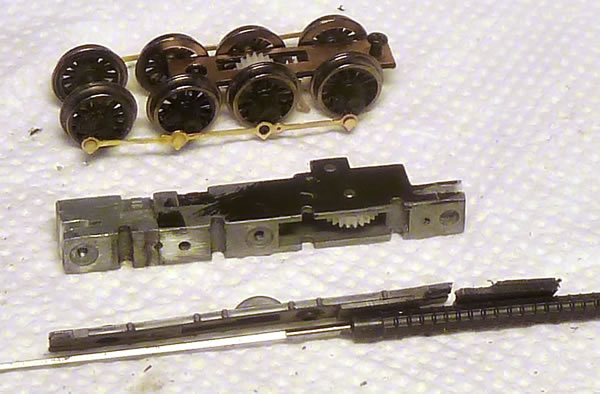
obtaining Romford wheel sets. Fortuitously, the wheel spacings of the
Mikado were identical to that of the Farish class 08 diesel that has
supplied so many successful chassis to our layouts. All I had to do was
just to add one extra wheel!
Thanks to David Churchill, I was lucky
enough to be sent a couple of drawings and works photographs. The
engines gradually evolved in India as is always the case!
First of all I produced a drawing of
the beastie with the tender drawn to fit a powered chassis. I did not
intend to power the locomotive itself but drive it using an N gauge
bo-bo diesel in the tender. The class 08 chassis just had to be
extremely free running.
This drawing was produced so that when
showing on my computer screen, it was exactly the correct size! Other
than a 6ins engineering rule, I have no engineering measuring
instruments. I tend to regard loco building more as animated sculpture
rather than miniature engineering!
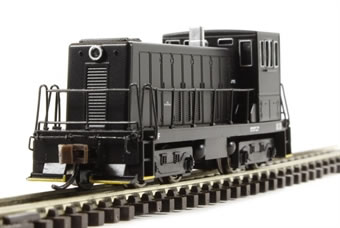
A Bachmann loco was purchased from Hattons
a 82051 GE 70 Ton Diesel.
Failed attempt 1
Over time, I had collected a number of dead
class 08 chassis and it was towards the scrap drawer I searched for two
chassis blocks which luckily were available.
Two sets of frames for the Darjeeling
Pacific were sent to me by Backwoods. If I had known that there was to
be a delay in wheel delivery, I would have built my own frames!
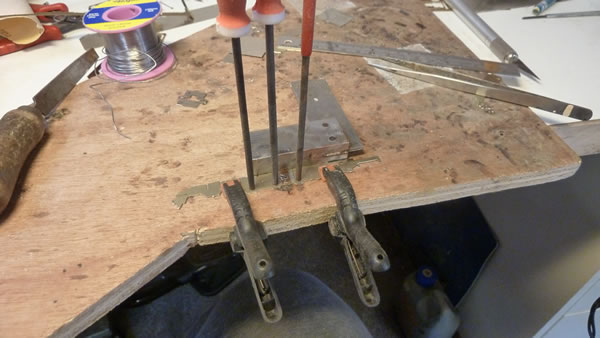
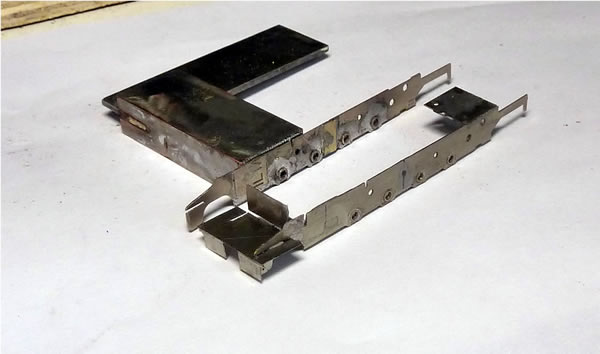
The frames arrived from Backwoods. Two
sets. They were carefully cut in half and resoldered using a simple jig
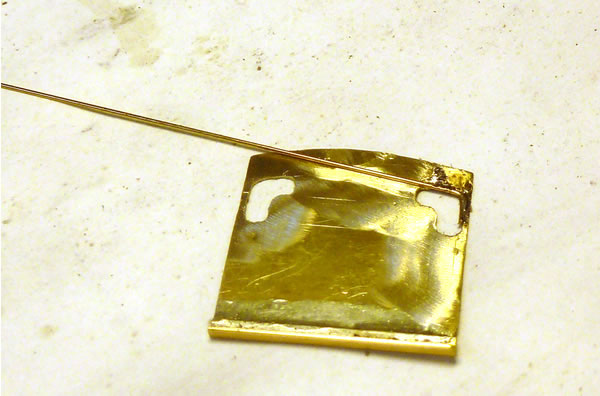
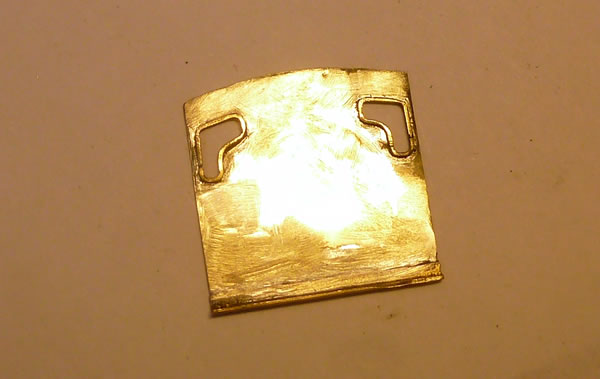
to ensure everything is in line. The joint was then re-enforced with a
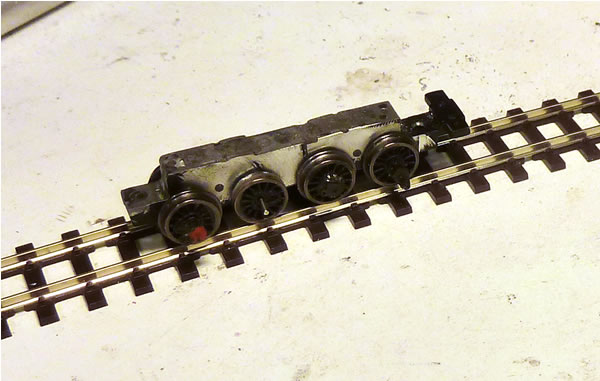
back plate. The front of the chassis was then cut and shortened.
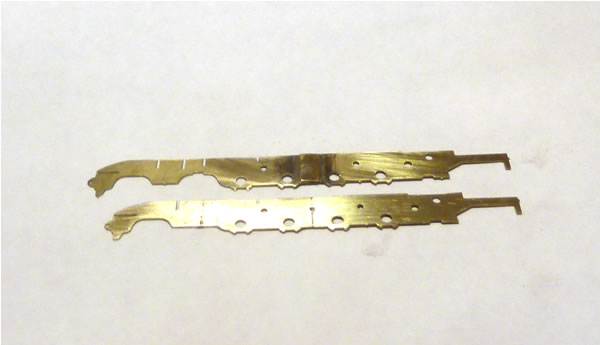
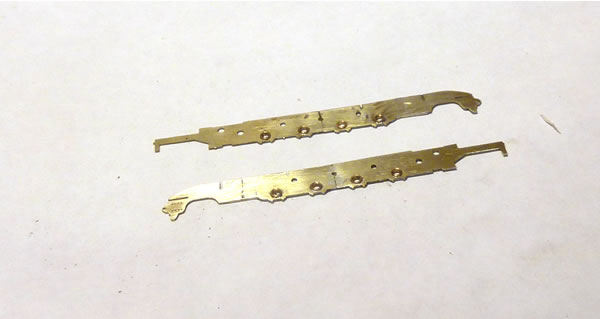
Here one frame is shortened and the other not. A small fillet had to
be added to fill the remains of the second wheel arch
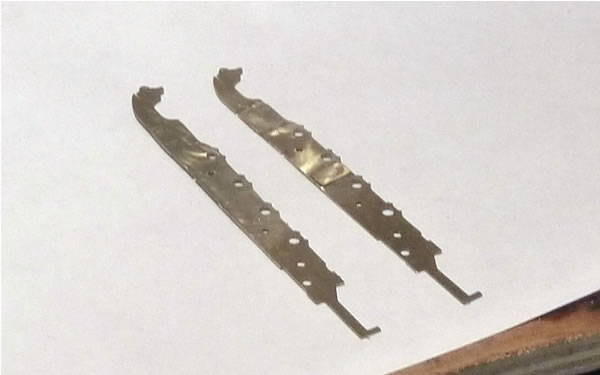
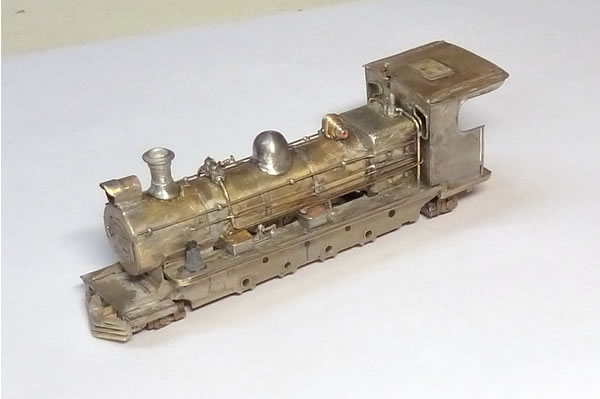
Here, the frames are almost complete
Here, the front buffer beam has been fabricated.
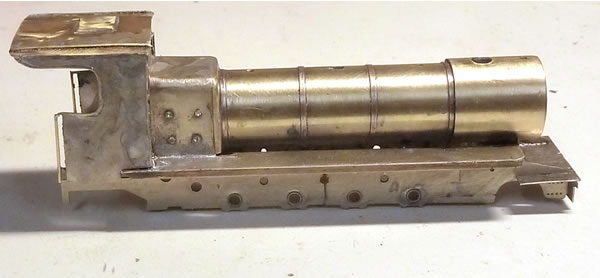
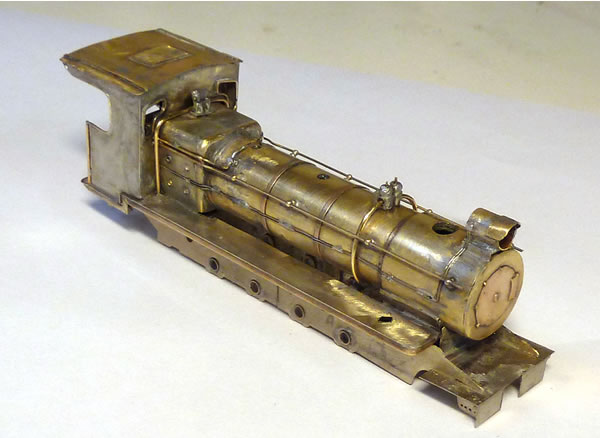
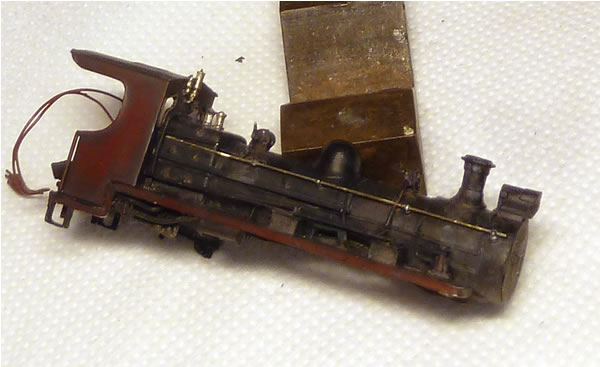
This is the boiler for the beastie. It was formed on an aluminium
marker pen of the right diameter from .2mm brass sheet. The bands are
phosphor bronze strip and the door was an etching I had in stock.
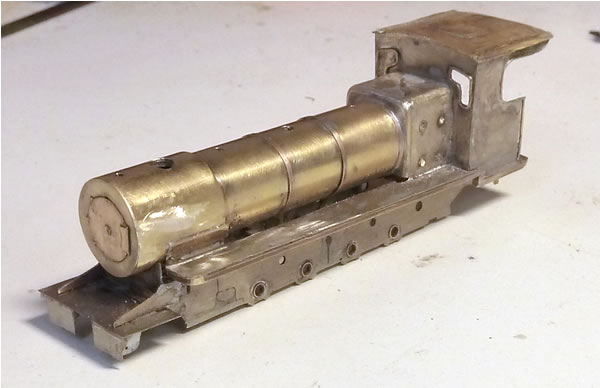
The smokebox is almost complete. I am using Backwoods castings of
dome and chimney from their 'Russell'.
Thick brass rod is formed to make the curve of the firebox front and
is infilled with N/S sheet

The sides are if the firebox are formed with sheet and soldered
carefully to the firebox end. Care is needed to keep everything nice and
square. The whole thing is then cleaned off.
Again, making sure that everything is square and lined up, the firebox
is soldered to the boiler barrel.
The washout plugs are drilled and brass rod soldered in. These will then
be trimmed, and drilled.
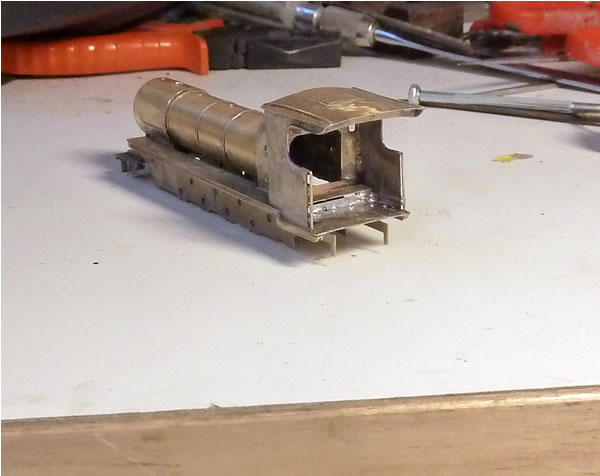
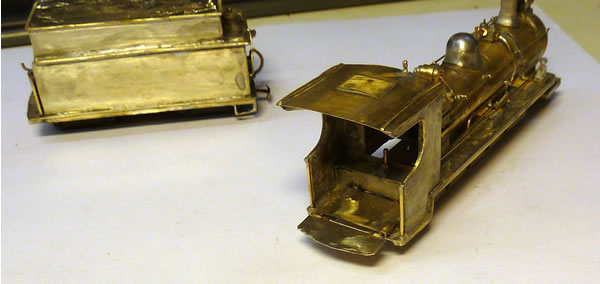
After cutting out the cab front, I had the
difficult task of cutting out the spectacles. This was done with various
Dremel grinders. The hardest part was to solder on thin wire for the
spectacle plates and get them to be more or less mirror images of each
other. The annealed wire was then sanded off flat. My trusty engravers
chisel is an essential tool to remove excess solder.
The cab front was then soldered to the boiler making sure everything was
aligned correctly.
 The cab sides were
added. I later modified the shape of these.
The cab sides were
added. I later modified the shape of these.
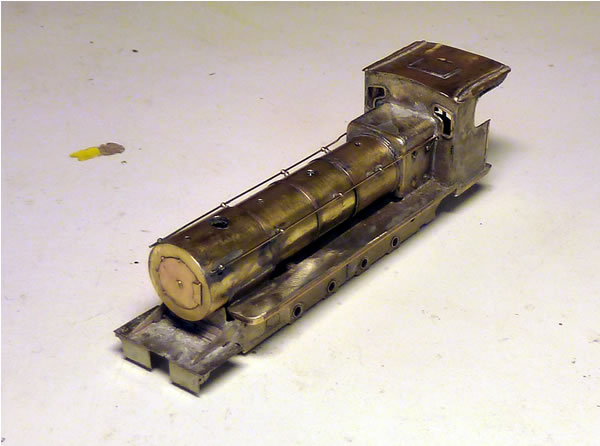
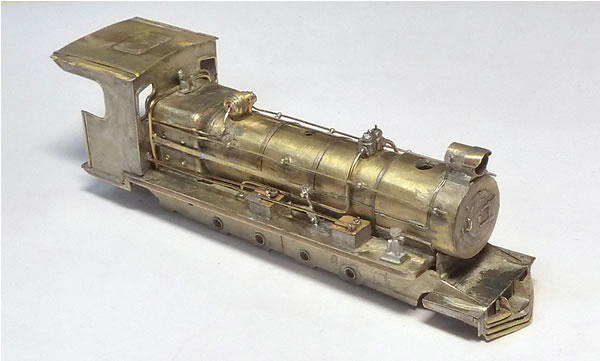
Here, the running and
foot plates are installed. Now for the smokebox support saddle.
The firebox was built as a separate module.
 Here, I have made a
simple jig to mark up the positions of the holes to be drilled for the
handrail knobs.
Here, I have made a
simple jig to mark up the positions of the holes to be drilled for the
handrail knobs.
Shown with the firebox loosely in place.
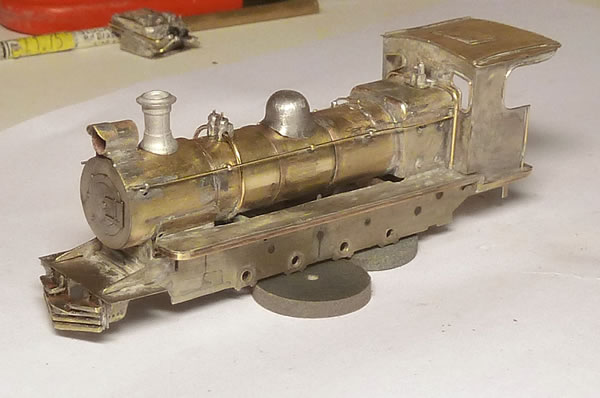
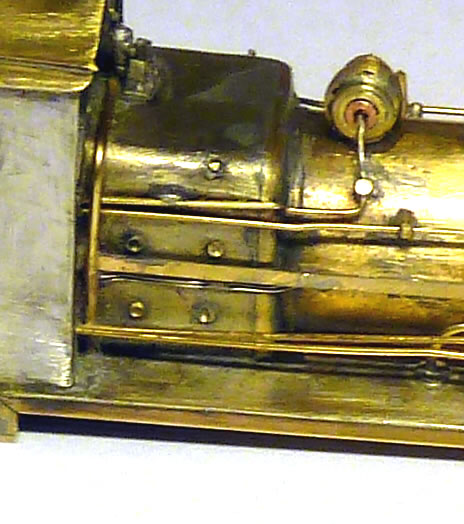
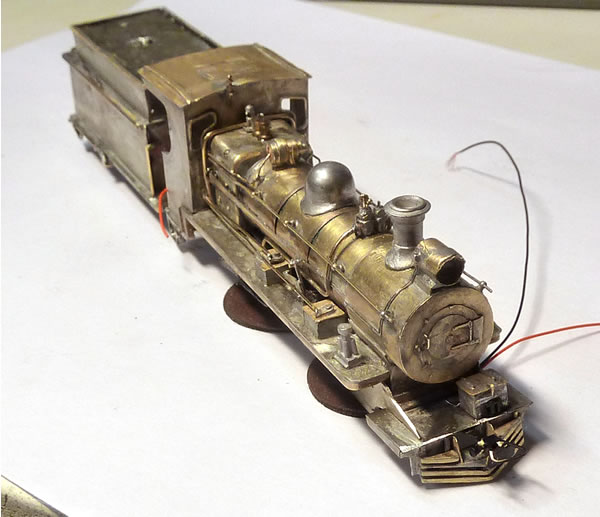
 Here plumbing has
begun. I was later able to obtain better lost wax castings for the top
feed from Walthers .
Here plumbing has
begun. I was later able to obtain better lost wax castings for the top
feed from Walthers .
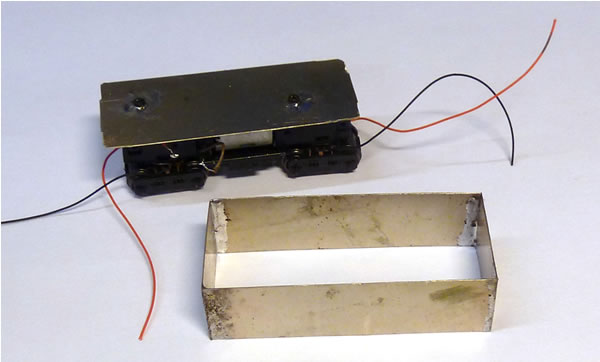
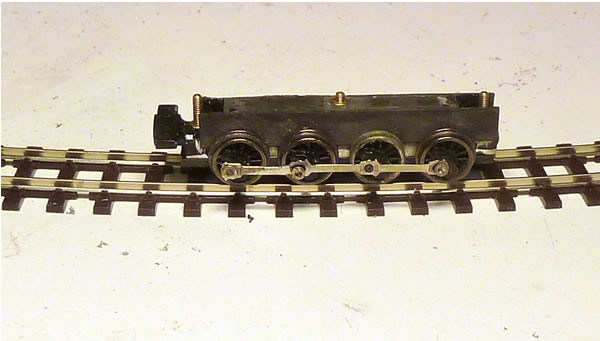
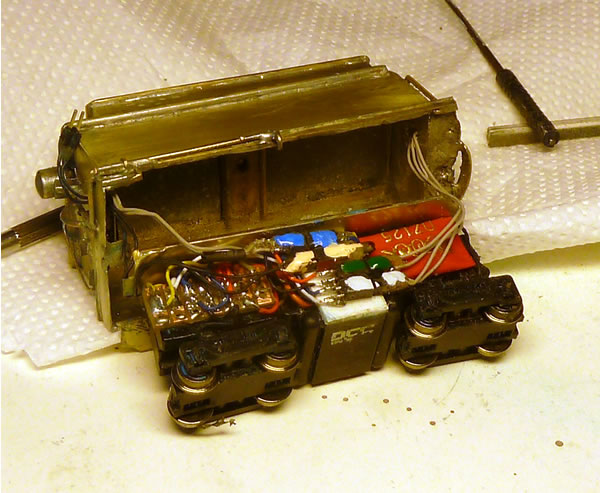
This is the Bachmann
tender unit. The DCC circuit board was replaced by a Digitrax 125
decoder.
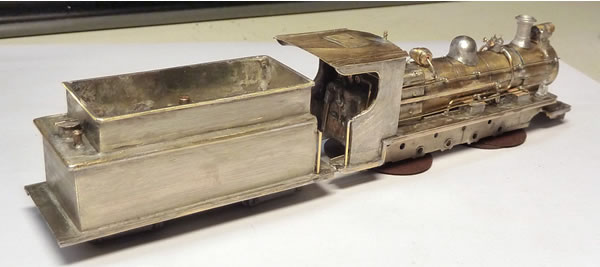
The tender is largely complete and I have changed the shape of the cab
sides.
The hinged footplate flap can be clearly seen.
To give the impression of pipe fittings on
the plumbing, I use 3 amp fuse wire, tie it round the wire and touch
with solder, A litte effort with a file and it is done. A couple of
things I made by carving lumps of white metal. For this, I use the
Dremel and engravers' chisels. They are also perfect for removing excess
solder and epoxy from under the fingernails.
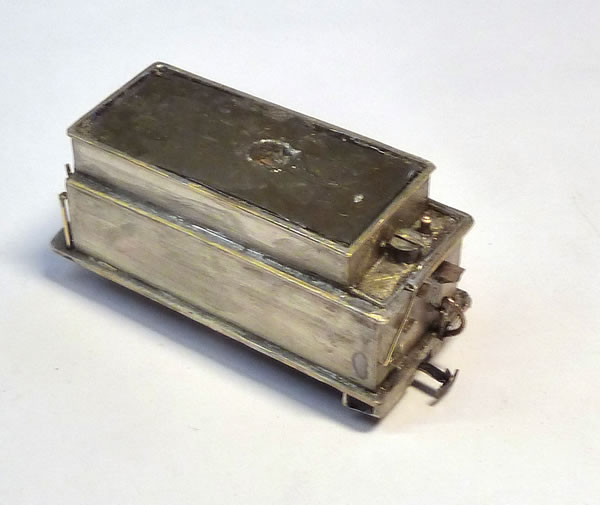
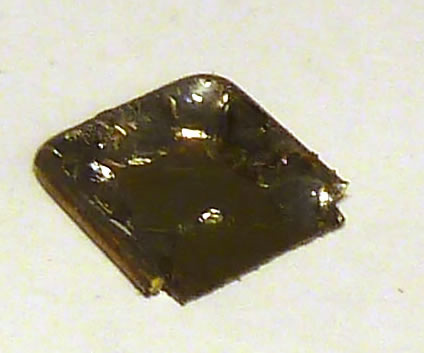
The power to a companion car is fed to a socket in the front toolbox
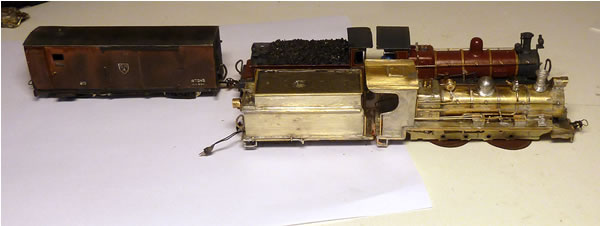
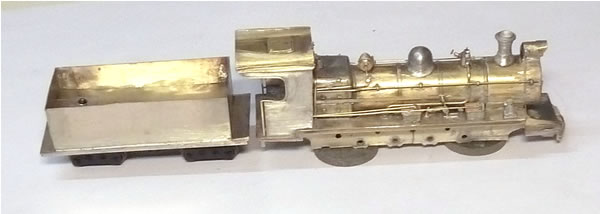
A size comparison with the Darjeeling Pacific. The Gwalior loco is so
large that I had to build at a slightly smaller scale to make sure it
would clear the layout. (3.75mm/1ft)
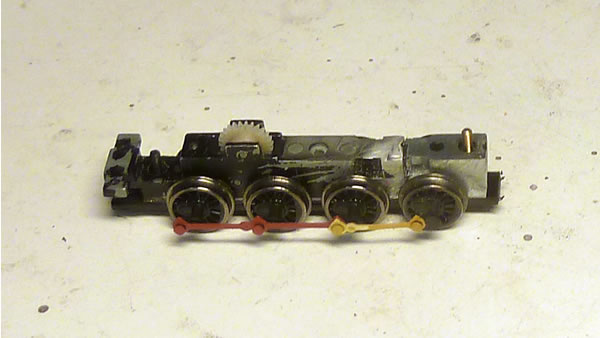
It was at this time that I got tired of
waiting for the Romford wheels and decided to use a class 08 Farish
chassis from my scrap box!
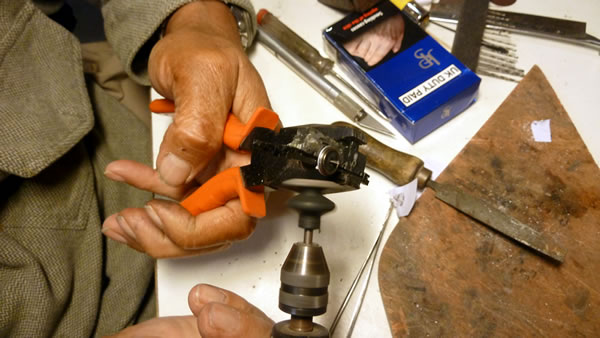
Here the flanges are being removed using the Dremel and a spare bit of
chassis. The wheel spins round nicely! Care is needed not to overheat
the wheels.
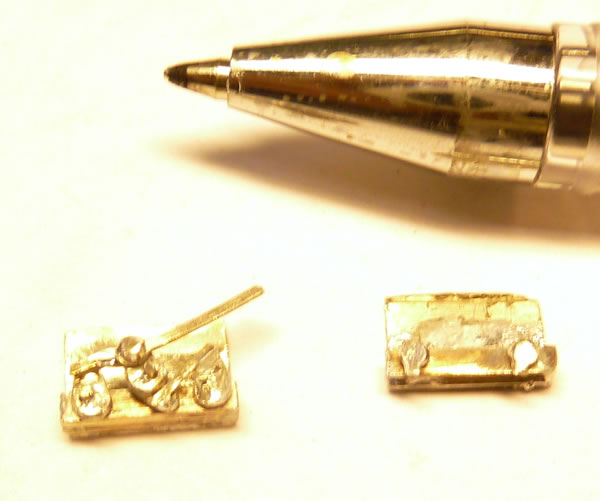
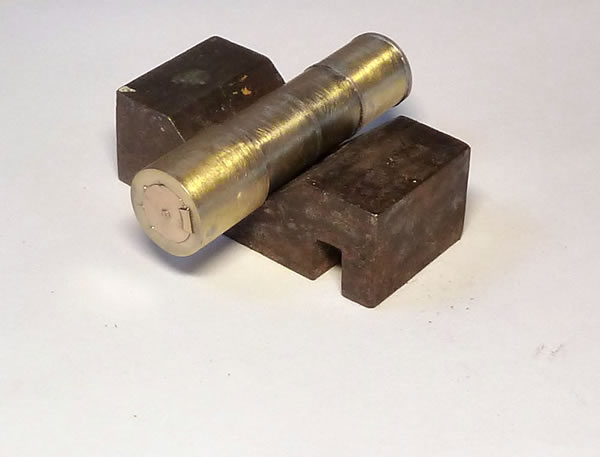
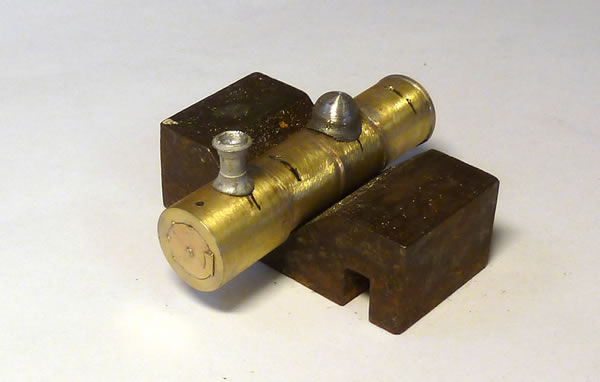
So now the concept is proved, this are
the start of the final crankpins. Wire is soldered onto washers and
cleaned off. They will then be cut to length and glued into place with
superglue.
To minimise drag, I elected to use Roco
valve gear (Roco 09-106-08-1 16295). It has a double slide bar rather
than a single but I have ignored this one!
The hard part is to move from the metal return crank to the plastic
eccentric rod. The eccentric rod terminates as a push-in pin. This had
to be removed and its end drilled. The only effective way to do this is
by using a thin bit of pointed wire which is pushed through while
holding a soldering iron to the wire. Once assembled, a touch of non
drip superglue is used to hold the rod in place.
The driving wheel sets were coated with
Bullfrog Snot traction tyre substitute and this helps make sure the
wheels turn round!
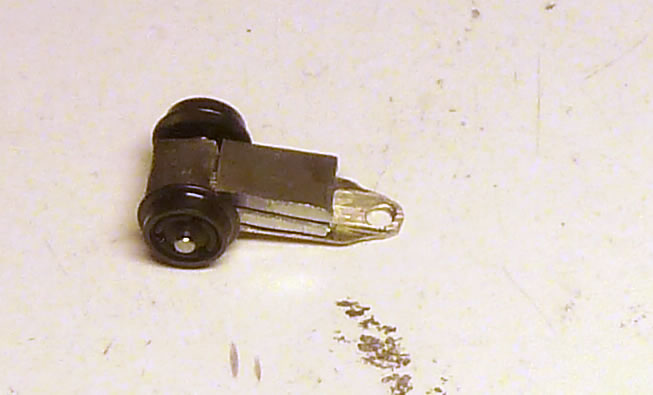 I had to make a new
inside frame front pony truck as I discovered that the one I had built
would foul the cylinders too much on curves.
I had to make a new
inside frame front pony truck as I discovered that the one I had built
would foul the cylinders too much on curves.
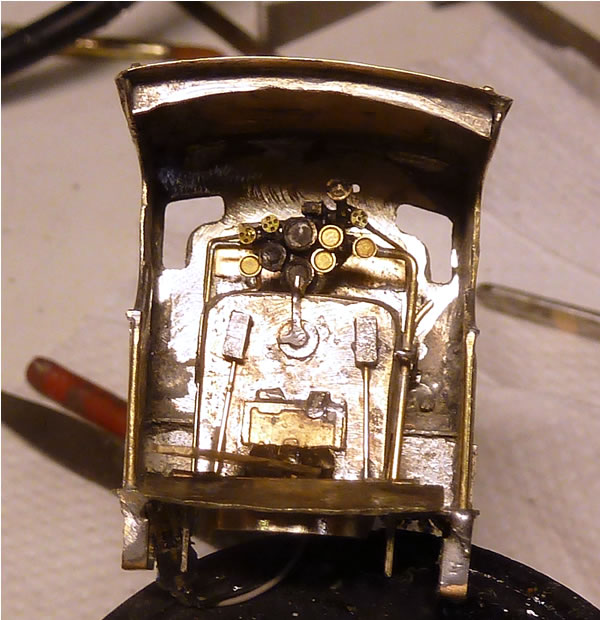 The competed cab detail
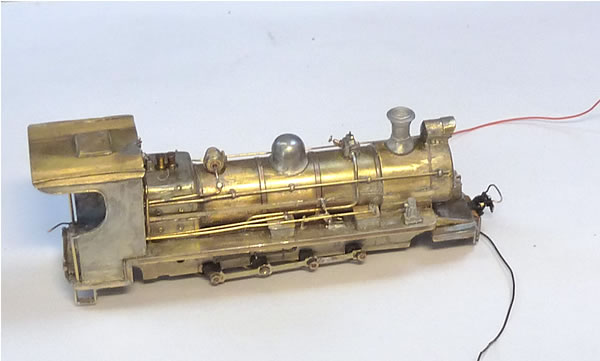
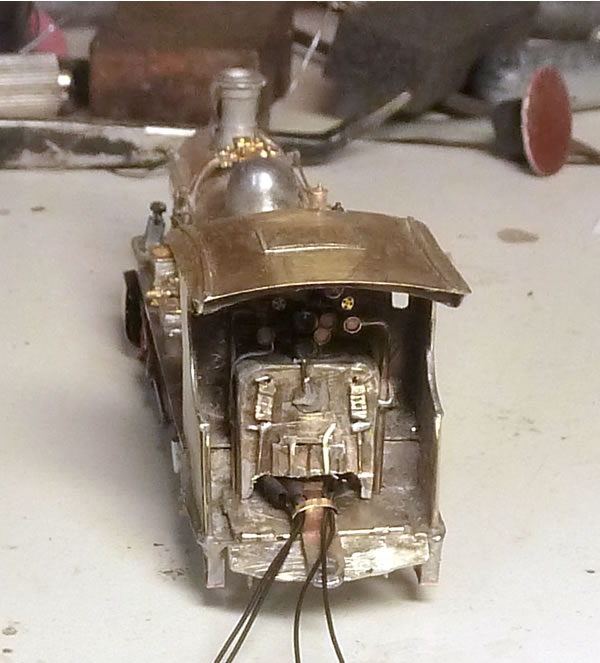 This is how the wiring
is brought to the tender.
This is how the wiring
is brought to the tender.
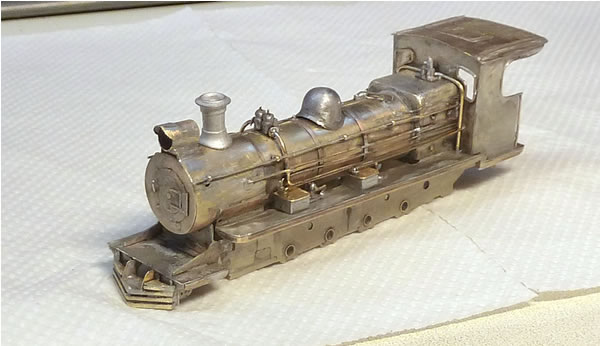
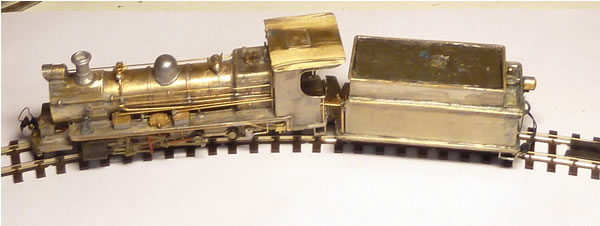
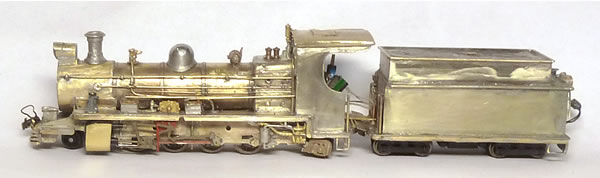
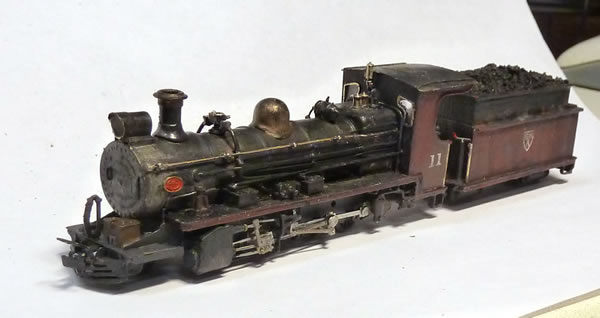
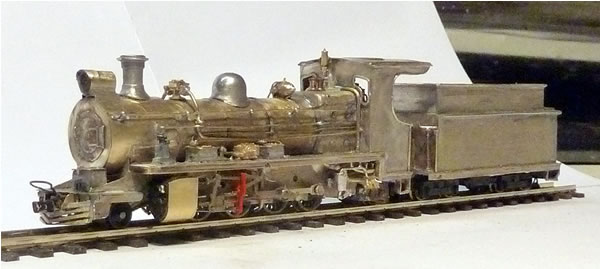 A portrait just before
painting.
A portrait just before
painting.
I used an air eraser to clean the loco and
then sprayed with etching primer and then black. This loco is to be
shown as quite weathered by well looked after.
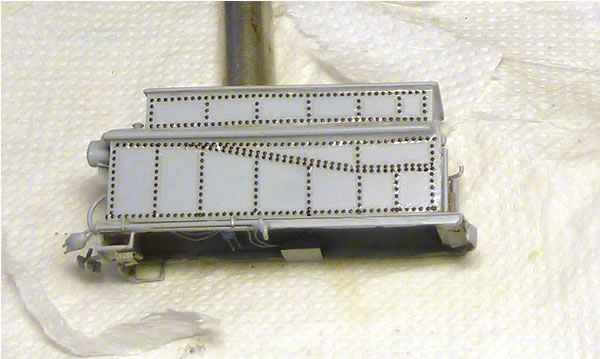 The application of Archer rivets
I forgot to put on the pony tracks before photographing the loco here!
The dome and chimney cap were gold leafed
by myself and then weathered.
The final parts to make were the ashpan.
This was delayed to make sure they did not foul the pony truck or rails.
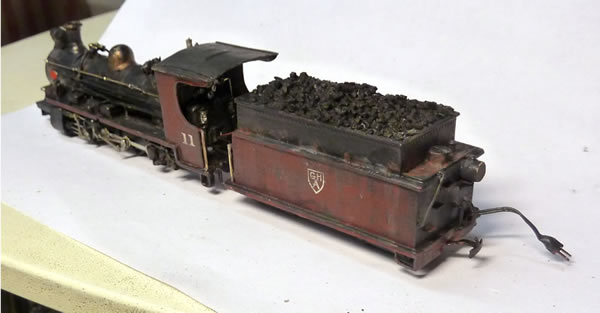
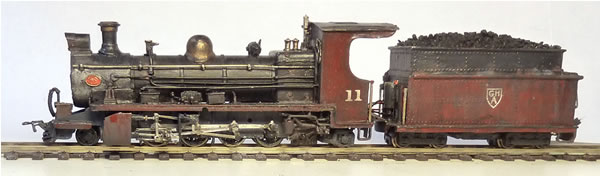 A final portrait of the completed
beastie. I am still waiting for the loco crew to arrive!
A final portrait of the completed
beastie. I am still waiting for the loco crew to arrive!
Failed attempt 1 was at least a learning curve
Successful attempt 2
In the end, I built a new chassis which is
powered too and now we have a wonderful locomotive which runs without
any problems at all. The chassis was built again. One cannot expect a
powered tender to push the loco chassis in front in a reliable manner.
Moral. If one gets into modifications, one
is into development and this can be a long and painful process.
 With the new powered loco chassis and
lined.
With the new powered loco chassis and
lined.

|