|
how to get your own custom etchings
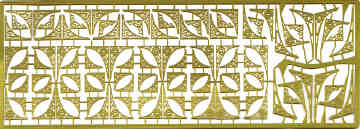
selection of cast iron brackets
Despite the large range of
etchings available on the commercial market, sooner or later, you may need
to generate your own etched parts. Some people are prepared to do the
entire job themselves. A simplified method is described in the excellent
pages of
Nigel Lawton. Here, I will describe
only how to prepare your artwork so it is ready to be etched by a
professional companies such as
PPD or
Worsely Works
Some companies will accept
drawings made by hand. They will be converted but there is an additional
cost. It is far better to learn how to prepare the drawings yourself.
There may be some differences in drawing requirements depending upon the
company undertaking your job, so you will need to check with the outfit of
your choice. We shall describe the requirements of PPD.
When drawing on computer,
the usual formats are Tif, JPEG, BMP, PSD or Gif. Such drawings have lines
which have a finite thickness. This makes it impossible to accurately draw
a small detail due to the line thickness.
We have to learn how to
draw using VECTORS. These lines have technically no thickness. To do this,
we must use programmes such as:
Autocad 2010 - .dwg, .dxf,
.dgn
CorelDraw Version 14 - .cdr, .pdf, .eps, .ai
Adobe Illustrator CS4 - .ai, .pdf, .eps
Turbocad Version 15 - .tcw
Autosketch Version 7 - .skf
The etcher will only be
interested in the coloured fills rather than any initial lines you may
have drawn.
This enables you to draw
your etching at a larger scale and then reduce it to the size you require.
PPD prefer that you send the data at the absolute scale required.
Alternatively, you must clearly place a dimension on the drawing.
Most etchings for our
models are made either brass or nickel silver. I would always suggest the
latter. This allows soldering far better and takes paint much
easier. Locomotive valve gear can be etched in stainless steel, for
instance, which will resist accidental soldering when being assembled;
always a huge risk. The material is also a great deal stronger so parts
can be much finer but will still not bend when the motion turns.
Etching, in principle will
cut right through the sheet by etching from the back and the front.
Half thickness etching is done by etching from one side only. This allows
details to be created such as coach panelling, rivets, etc.
It is suggested that your
drawing is prepared in layers. You should produce a master copy showing
all etch cuts, but the etcher will require two drawings. One representing
etching required to the front of the piece and another for etchings from
the back. The master copy enables you to check that everything lines up as
it should.
METAL ETCHING - BLACK
HALF ETCH FRONT - RED
HALF ETCH BACK - BLUE
ETCH THROUGH - WHITE
It is important if using this colour scheme that the drawing is layered,
as a different colour scheme is needed where no layers are being used. You
should also include 'target' register marks. Below is a rough idea of what
part of a coach drawing should look like. Discussions with your etcher,
once they have seen your artwork will help solve any glitches that you may
have included.

front drawing showing panelling, rivets and holes for door handle etc.

rear drawing
Some suggest that things should be drawn
slightly large to allow for under cutting during the etching process. For
the very thin sheets most of us use, I do not think it is an issue. I tend
to make fold lines the same thickness as the metal sheet.

|