|
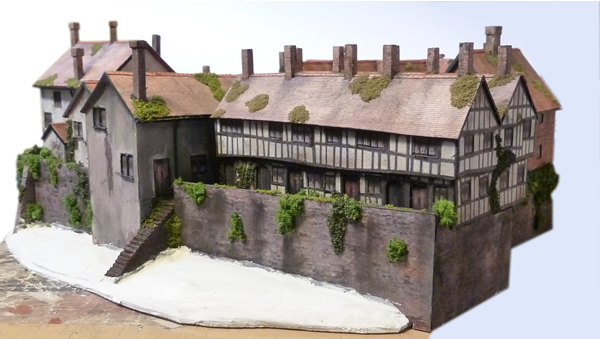
making a house
The first sheet is printed on
high quality photo paper and the rest on Premium Photo
glossy which is thin card. These are cut out and glued
together with PVA which results in a most rigid and stable
structure.
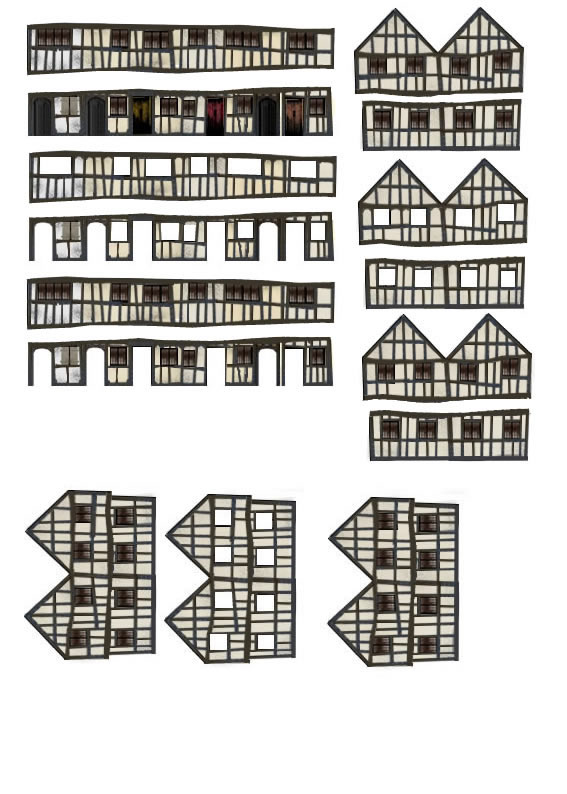

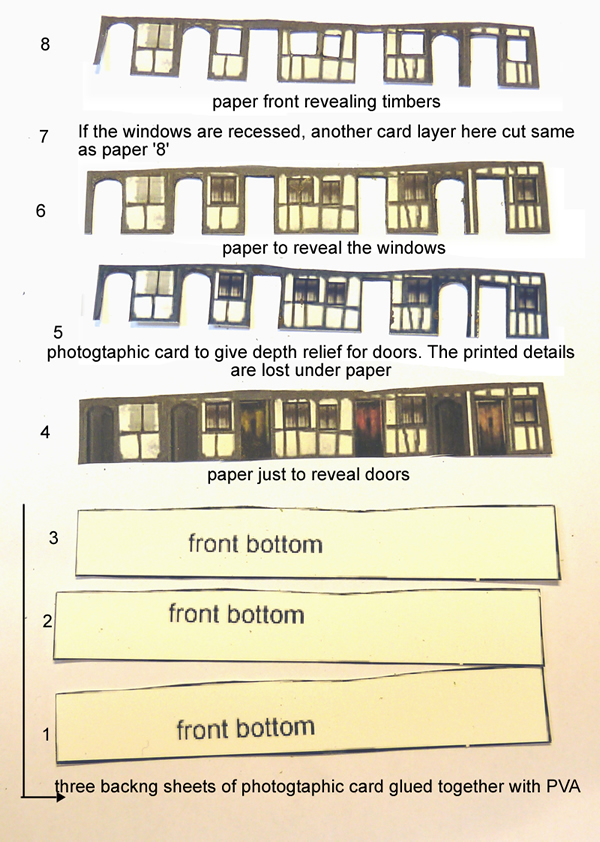
The photo below shows the sequence of layer
application (starting with '1'). Early Tudor windows were almost flush so in
this case there is just a paper thickness. Prior to gluing together, the cut
edges are painted with the right colour.

The layers are put together by painting PVA to
the back of the sheets. It is quite hard to line up the paper sheets and
care is needed. Once assembled and pressed together, excess PVA is removed
using cocktail sticks. Any touch up with paint is also done at this time. I
usually carefully repaint the reveals. One window has shutters. The final
ones will be glued on later.
Then while still a bit damp, I apply weathering powders with a small stiff
brush and then place the assembly in a press for an hour.
Once the PVA has dried hard, the edges of each
assembly are sanded flush to the mark line of the top lamination. Obviously,
with so many laminations, not all will be quite in register. Always make
sure that the sander rotates towards the back of the panels to prevent the
surface paper making swarf on the surface. Where necessary, reverse the
rotation of the sander.
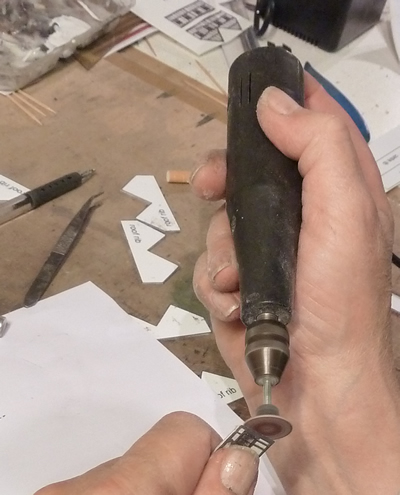
Where jointed to another panel, the ends are
mitred again using the Dremel sander.
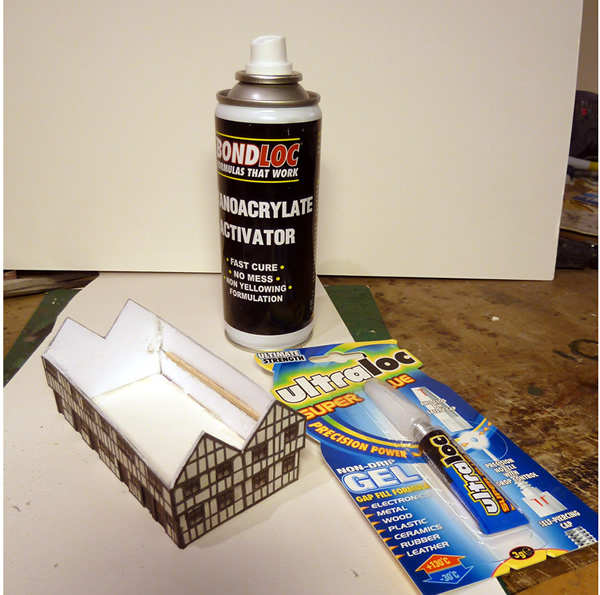
So now to assembly. I use mostly gel type
superglue which is bought in vast quantities along with activator. Liquid
superglue can too easily run onto the printed surfaces and ruin them.
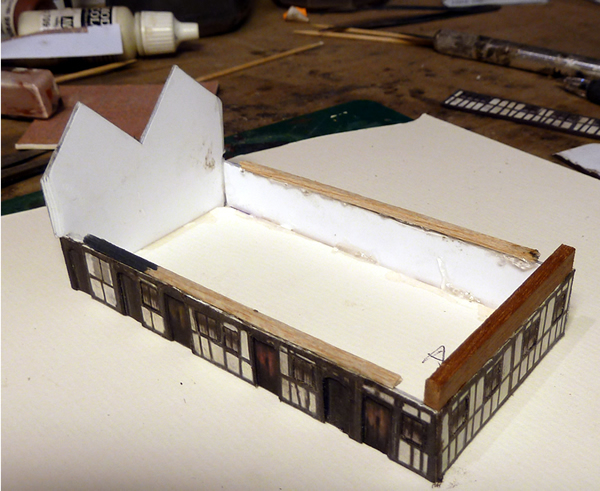
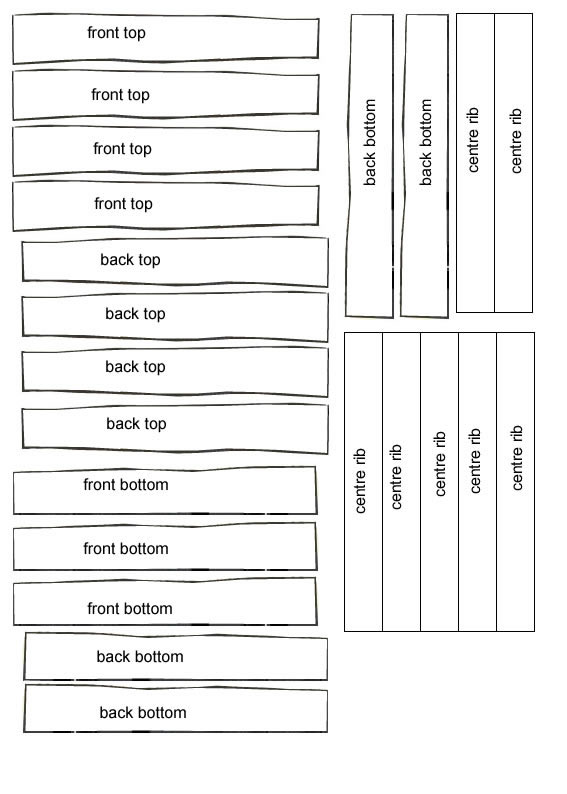
The ground floor is put together making sure
that the mitres are accurately fitted and a base in mount board is glued
into the bottom to hold it all nice and square. Strips of wood are glued
onto the top of the lower story to give attach points to the jettied upper
story.
Here the upper story is glued in place.
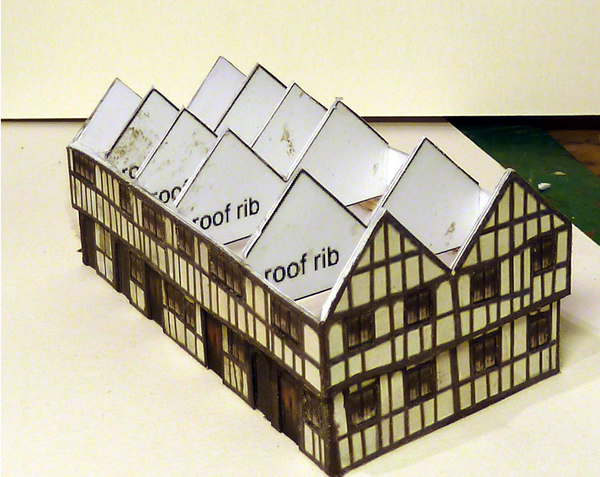
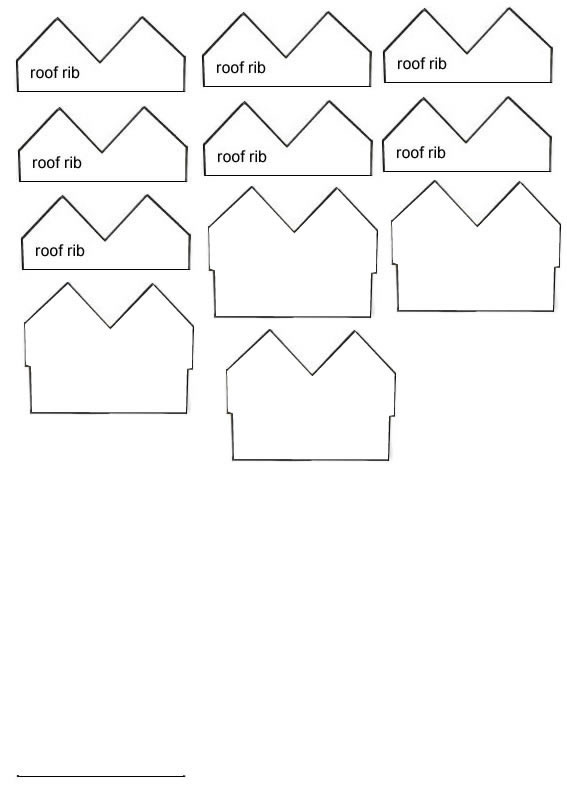
The trusses are now fixed. In this case, care
has been taken to make sure they are not all in nice straight lines as the
roof has to be 'wonky'.
Normally, my roofs are attached to mount board. Its thickness serves to copy
bargebaords. For the 'wonky' roof, the tile paper is attached to cornflake
packet which is far more flexible. The tile paper is attached to the card
backing using spray mount, by the way.
Once a roof section is cut, the visible underside is painted and then the
roof fitted. The glue is placed on one surface and the other is flooded with
accelerator. The accelerator does not damage the model at all but does make
one cough!
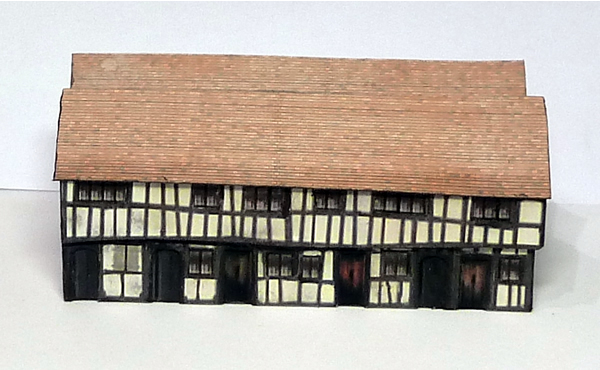
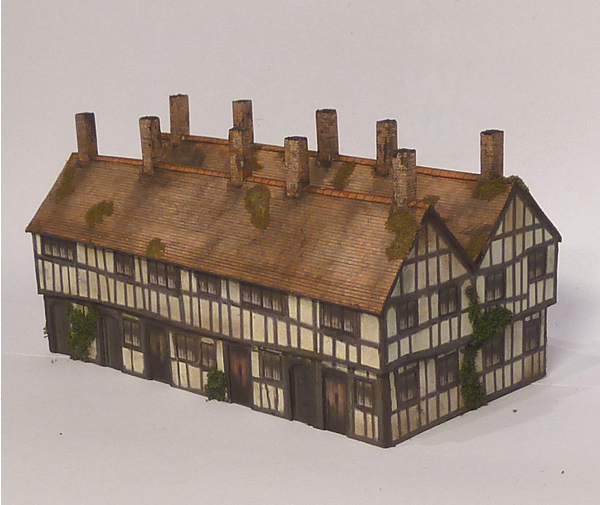
The roofs are glued into place followed by the
chimneys. Weathering of the model then follows.

|