|
Structures
I always
prefer to start with the structures as these do take time
but are easily stored. This minimised the length of time
that baseboards dominate the scenery! The station building
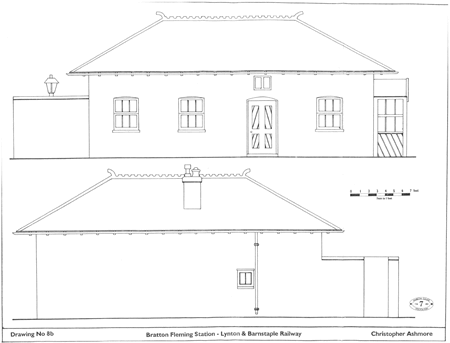
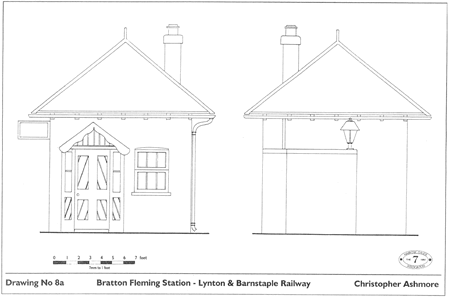
will be made using Wills plastic sheets. I have some scale drawings produced by Chris Ashmore. These
are produced to a scale of 7mm/ft and will have to be
reduced down to 4mm/ft. I also Have drawings produced by
Chris Leigh for 4mm/ft.
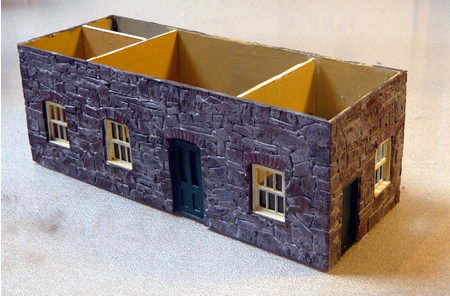
The station
walls were constructed using Wills random stone sheets,
Wills industrial arches, Ratio gutters and down pipes and
Wills and Ratio windows and doors. I also used various
thicknesses of plastic sheet. The Ratio windows needed a bit
of butchery by moving the horizontal glazing bars. They were
then spray painted cream and the doors, green.
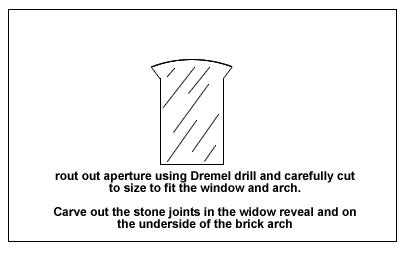
One thing
that I see over and over again, are Wills brick arches glued
to the surface of building sheets. This leaves them standing
out proud rather than being flush with the building sheet.
The arches are supplied marked only with alternate bricks.
The intermediate bricks need to be carved out using a
scalpel. The arches are cut to size with two being glued
together to increase the thickness. The lower edge is carved
to show the brick courses.
This
procedure takes more time but the end result is far better.
The corners
of the walls are mitred. These are glued together using
Plastic Weld while being assembled around a pre-cut floor of
plastic sheet. Once the paint is dry, the windows are glazed
using the clear plastic sheet from the Wills packaging.
Before the
widows and doors are fitted, the stonework must be painted.
I now only use water based acrylic paints and first paint
the blocks a variety of browns. While the paint is still
damp, I apply brown weathering power. Various greys are then
dry brushed over the surface. Once dry, I damp the walls
with a mister (detergent added) and run dilute white paint
into the mortar gaps. This runs most satisfactorily down the
walls representing mortar, although more than one
application may be needed. The surface of the stones is then
dabbed with paper towels until a realistic finish is
obtained. The brickwork is picked out in a variety of
colours as required. This process considerably lightens the
stone finish, so this must be allowed for during the initial
painting.
Interior
wall were then added with whatever detail I chose to
include.
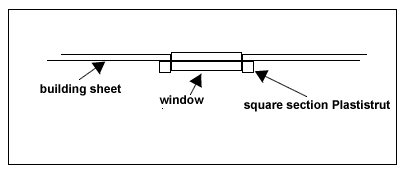
The windows
and doors can then be fitted, being supported by square
section Plastistrut on the inside.
The roof is built using 1mm
thick plastic sheet. As always, hip roofs are more
challenging and care is needed to ensure that the pitches
are correct. The roof has a considerable overhang. This is
why I built the walls of the building so high so that they
support the roof at the correct height.
The unusual diagonal slates
were added only where they would be seen (due to snow
slippage) and ridges were fitted. This building has ornate
ends to the ridge tiles which were carved out of solid
plastic. The single chimney was added at the rear.
basic structure of the
station completed
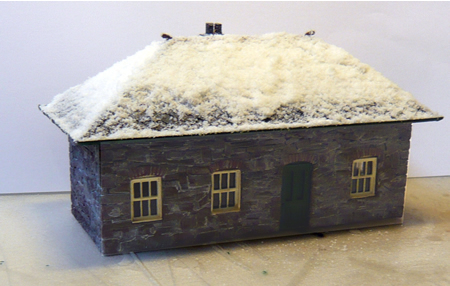
with the hip roof completed,
the first coats of Woodland Scenics 'snow' is added
Barring some details, the
building is finished and snow applications continue. The
climbing plants must also be affixed to the walls.

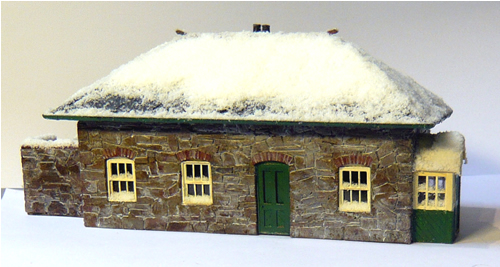
the completed snow
application using microballoon.
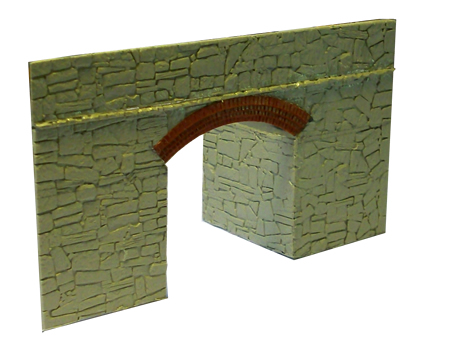
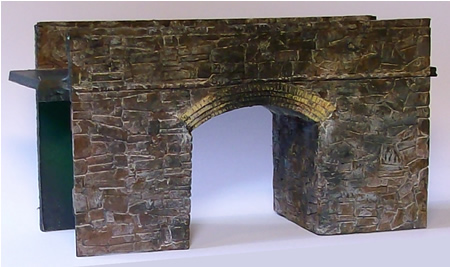
the bridge
The bridge is
still extant. Construction was again in
plastic.
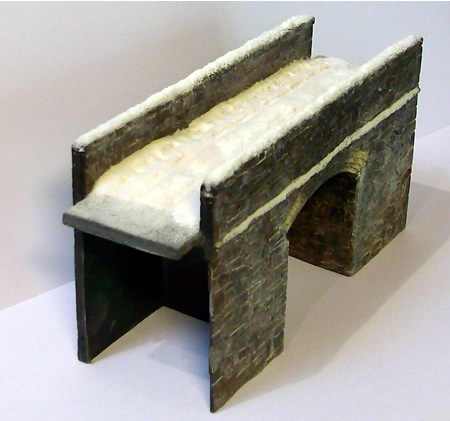
the completed snow
application using microballoon.
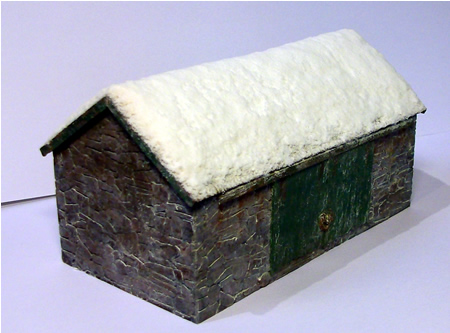
the
goods shed
With
only one known photo of this structure, a lot of the
model is guesswork.
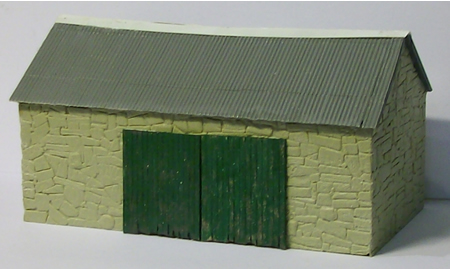
the goods shed under way.
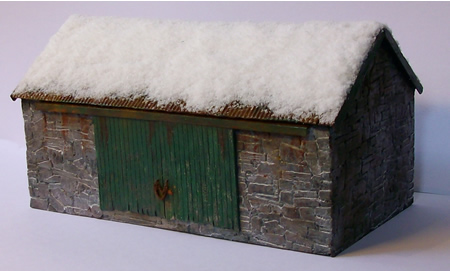
The snow bulk is
made up with Woodland Scenics 'white gravel' Many
further treatments will be needed to have 'real snow' .
the completed snow
application using microballoon.
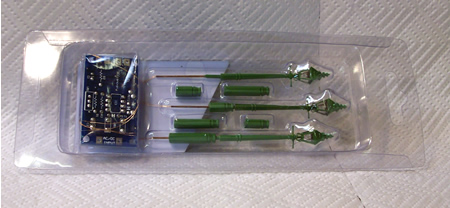
lighting up
There are three
lamps at Bratton Fleming and I spent some
time searching for good representations of
those used. As we are modelling day and
night, these lamps have to work, of course.
Head and shoulders above all others were
from
DCC Concepts based in Oz. I later
discovered that they are supplied in the UK
by DCC Supplies.
SR gas lamps
were ordered and arrived in a pack of three
with extension posts and a circuit board
which allows you to adjust the light
intensity. The quality of these things is
better than anything else I have seen (UK
white metal caters take note).
The colour
seems to me to be a tad lurid but this was
easily put right by some very careful
painting. A word of warning: use water based
acrylic paint as enamels, for some reason
will not dry matt. One lamp is mounted on
the Gents wall at the station and therefore
has no pole. This I removed by sanding it
with a Dremel. In the centre is a very fine
brass tube in which are the two thin power
wires. Handle these carefully to prevent
damaging the insulation. Once the pole was
removed, I continued to carefully sand the
brass tube until it nearly cut through. It
then very easily breaks off.
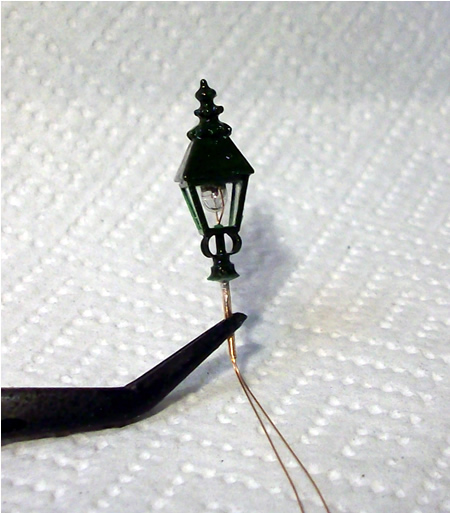
The small
copper wires were cut short, the insulation
scraped off at the ends and soldered to thin
insulated multi-strand wires. The toilet
wall was routed to half thickness and a
small hole drilled in the floor of the loo
to let the wires through. The lamp was then
epoxied in and snowed up. A further lamp was
modified to become a wall mounted unit,
while the third was fitted as the stand
alone lamp near the footpath entrance to the
station.
Warm white LEDs
were also installed in the building using
3Kohm resistors to maintain the lights dim.
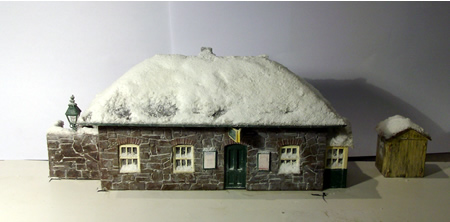
the station
with lamp attached - click on image to
enlarge

|
